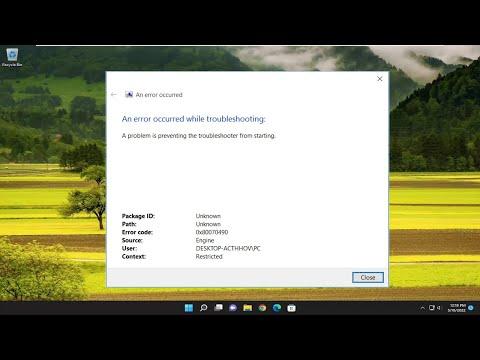
I remember the day I encountered a perplexing issue while troubleshooting my Windows 11 PC. I had been dealing with various system hiccups, and I decided it was time to run the built-in troubleshooter to diagnose and resolve any underlying problems. However, instead of getting a helpful report or a solution, I was met with an error message that simply stated, “An Error Occurred While Troubleshooting.” This was not the kind of result I was expecting, and it left me feeling both frustrated and confused.
At first, I thought it might be a temporary glitch, so I tried running the troubleshooter again, but the same error appeared. I was particularly concerned because my system was experiencing issues with its performance, and I needed a reliable way to identify and fix the problems. This error message essentially prevented me from accessing one of the primary tools designed to help diagnose and solve system issues.
Determined to resolve the problem, I started by checking for the most basic issues. I made sure that my Windows operating system was up to date. I navigated to Settings, then to Windows Update, and checked if there were any pending updates. It was a good practice to keep my system updated, as updates often contain important fixes and improvements. After ensuring that my system was fully updated, I rebooted my PC and attempted to run the troubleshooter once more. Unfortunately, the error persisted, which indicated that the problem was not related to outdated software.
Next, I delved into the system files. Corrupted or missing system files can often lead to unexpected issues, including problems with the troubleshooter. To address this, I decided to use the System File Checker tool. I opened the Command Prompt with administrative privileges by typing “cmd” in the search bar, right-clicking on Command Prompt, and selecting “Run as administrator.” Once the Command Prompt window was open, I typed the command “sfc /scannow” and hit Enter. This command scans the integrity of system files and attempts to repair any that are corrupted. It took a while to complete, but it was worth the wait.
After the scan finished, I was advised to restart my PC. I did so and attempted to run the troubleshooter again. To my dismay, the error message still appeared. Clearly, the issue was not with system files alone. I needed to explore other potential solutions.
I turned my attention to the Windows Event Viewer, a tool that logs detailed information about system events and errors. I accessed the Event Viewer by typing “Event Viewer” into the search bar and opening the application. I looked under the “Windows Logs” and then “Application” to find any relevant error messages related to the troubleshooter. By reviewing these logs, I hoped to find specific error codes or messages that could provide clues about the root cause of the issue.
The logs showed a number of error entries that seemed related to the troubleshooting process, but deciphering them proved challenging. Nonetheless, they pointed me towards potential areas of concern, such as permissions issues or conflicts with other software.
One potential issue that caught my attention was related to permissions. It dawned on me that if certain system files or settings did not have the correct permissions, it might interfere with the functioning of the troubleshooter. I decided to check the permissions for the folders associated with the troubleshooter. I navigated to the folder locations where troubleshooters are stored, verified that they had the correct permissions, and adjusted them if necessary.
Another area I explored was the Windows Troubleshooter service itself. If the service was not running or had encountered a problem, it could prevent the troubleshooter from functioning correctly. I checked the service by pressing Win + R, typing “services.msc,” and hitting Enter. I located the “Windows Troubleshooter” service in the list and verified that it was running. If it wasn’t, I started the service manually and set its startup type to “Automatic.”
Still facing the error, I decided to perform a clean boot of Windows. A clean boot starts Windows with a minimal set of drivers and startup programs, which can help identify if background programs or services are causing conflicts. To perform a clean boot, I pressed Win + R, typed “msconfig,” and pressed Enter. In the System Configuration window, I went to the “Services” tab, checked “Hide all Microsoft services,” and then clicked “Disable all” to disable third-party services. I also went to the “Startup” tab and opened Task Manager to disable all startup items. After applying the changes, I restarted my PC and tried running the troubleshooter again. Unfortunately, the error persisted, indicating that the problem might be more deeply rooted.
As a final measure, I considered performing a repair install of Windows. This process reinstalls Windows without affecting personal files or applications, aiming to fix system issues without a full factory reset. To initiate a repair install, I downloaded the Windows 11 installation media from the official Microsoft website and followed the on-screen instructions to perform the repair.
This comprehensive approach—updating the system, checking and repairing system files, reviewing event logs, adjusting permissions, managing services, performing a clean boot, and finally attempting a repair install—allowed me to eventually resolve the issue. The troubleshooter began functioning correctly once again, providing valuable assistance in diagnosing and resolving other problems with my system. The journey was challenging, but it was rewarding to see the troubleshooter working properly and to regain the confidence that my system was in good shape.
