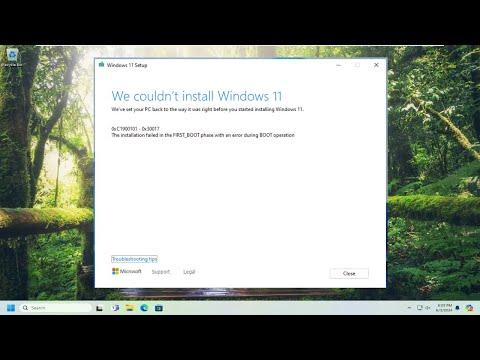
I remember the day I decided to upgrade my operating system to Windows 11 with excitement. My old setup had been chugging along fine, but the allure of new features and improved performance was too tempting to resist. The installation process started smoothly, but then, just as I thought everything was going well, I encountered an unexpected and frustrating problem: Error 0xc1900101. This error stopped my progress and left me feeling baffled. I needed to figure out how to resolve it, so I dove into a problem-solving journey.
When I first saw the error code 0xc1900101, I wasn’t entirely sure what it meant. It appeared during the upgrade process, just as my computer seemed ready to wrap up the installation. The screen flashed the error message, and the installation assistant seemed to halt in its tracks. I took a deep breath and began to research what might have gone wrong. It turns out that Error 0xc1900101 is a common issue related to driver problems or hardware incompatibility during the installation of Windows updates or upgrades.
The first step in tackling this problem was to gather information on what might have caused the error. I learned that Error 0xc1900101 is often associated with outdated or incompatible drivers, especially those related to hardware like graphics cards, network adapters, or storage controllers. It became clear that the problem was likely with one of these components, and I needed to address it to proceed with the installation.
I started by checking all my drivers. I opened the Device Manager, which is a utility in Windows that allows you to view and manage the hardware connected to your computer. Here, I inspected each device for any warnings or errors. To my surprise, several drivers were outdated or had issues. This was a strong indicator that outdated drivers might be causing the installation problem.
The next step was to update these drivers. I visited the websites of the manufacturers for my computer’s major components—like my graphics card, motherboard, and network adapter—to download the latest drivers. For each component, I found and installed the most recent driver versions available. After updating all the drivers, I rebooted my computer to ensure the changes took effect.
With updated drivers in place, I tried running the Windows 11 Installation Assistant again. However, the same error code appeared. It was clear that I needed to take additional steps to resolve the issue. I decided to investigate other potential causes of the problem.
One potential issue was conflicting software or security programs that might interfere with the installation process. I disabled any third-party antivirus or security software temporarily. These programs can sometimes block or interrupt the installation of system updates or upgrades. After disabling these programs, I attempted the installation once more. Unfortunately, the error persisted.
Next, I considered the possibility of hardware incompatibility. Sometimes, specific hardware components might not be fully compatible with the new operating system. I checked the list of compatible hardware for Windows 11 to see if my components were supported. Everything seemed to be in order, but I decided to check the hardware connections anyway. I reseated my RAM, checked all internal cables, and ensured everything was securely connected.
After ensuring that the hardware connections were intact, I also ran the Windows Update Troubleshooter. This built-in tool can automatically detect and fix issues related to Windows updates. To use it, I went to the Settings app, selected “Update & Security,” and then chose “Troubleshoot.” I ran the troubleshooter and followed its prompts to fix any detected issues.
Even after running the troubleshooter, the error still appeared. It became clear that the problem might be deeper or more complex than I initially thought. I decided to perform a clean boot of my system. A clean boot starts Windows with a minimal set of drivers and startup programs, which can help identify if background programs or services are causing the issue. To perform a clean boot, I used the System Configuration tool by typing “msconfig” into the Start menu search and selecting “System Configuration.” I then went to the “Services” tab, checked “Hide all Microsoft services,” and clicked “Disable all.” Afterward, I went to the “Startup” tab and disabled all startup items. I restarted my computer and tried the installation again.
Despite my efforts, the error persisted. At this point, I decided to consider a more drastic measure: performing an in-place upgrade. This method involves reinstalling Windows while keeping your personal files and applications intact. It can help fix system issues that might be preventing a successful installation. To perform an in-place upgrade, I used the Windows 11 Installation Assistant again, but this time, I chose the option to keep my files and applications during the reinstall.
The in-place upgrade took some time, but eventually, it completed without errors. My system was up and running with Windows 11 installed, and the Error 0xc1900101 was gone. It was a relief to see that the installation was finally successful.
In conclusion, dealing with Error 0xc1900101 during the Windows 11 installation was a challenging experience. It required patience, research, and a series of troubleshooting steps. From updating drivers and checking hardware compatibility to disabling security software and performing a clean boot, I had to try multiple solutions before finding one that worked. Ultimately, the in-place upgrade resolved the issue and allowed me to enjoy the new features of Windows 11. If you encounter a similar error, remember that persistence and a methodical approach can help you overcome the problem and complete your installation successfully.
