I vividly remember the day I stumbled upon a frustrating issue that seemed to taunt me with every attempt to fix it. It was a rainy afternoon, and I was preparing to update my Windows 11 system, eager to get the latest features and security patches. As I clicked on the update button, the process was interrupted by an error code I hadn’t seen before: 0x80072F8F. This cryptic number seemed to mock me, and with a bit of research, I discovered that it was related to problems with Windows Update, activation, or the Microsoft Store.
The initial panic was understandable. The error seemed to indicate a problem with my system’s time settings or a potential issue with my internet connection, but nothing seemed out of the ordinary. I took a deep breath and decided to dive into the problem systematically.
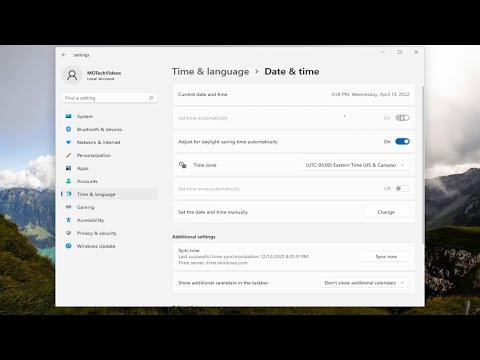
First, I checked my system time and date settings. I made sure that my time zone was set correctly and that the date and time were accurate. It might sound simple, but an incorrect time setting can cause a myriad of issues with Windows services. To my relief, everything was set correctly, but the error persisted.
Next, I turned my attention to the internet connection. I tested my network by browsing a few websites and running a speed test to confirm that my connection was stable. Everything seemed fine, so the problem wasn’t with my internet connection. At this point, I knew I needed to look deeper into the system itself.
I began by running the Windows Update Troubleshooter. This built-in tool is designed to detect and fix issues related to Windows updates automatically. To run the troubleshooter, I navigated to Settings > System > Troubleshoot > Other troubleshooters. There, I selected “Windows Update” and let the tool scan for problems. It found a few issues but didn’t fix them completely. While the troubleshooter’s efforts were appreciated, it didn’t resolve the 0x80072F8F error.
Determined not to give up, I moved on to a more hands-on approach. I decided to reset the Windows Update components manually. This involved stopping certain services, deleting temporary update files, and then restarting the services. I opened Command Prompt as an administrator and ran a series of commands to stop the BITS (Background Intelligent Transfer Service), Windows Update, and Cryptographic Services. After that, I deleted the contents of the SoftwareDistribution and Catroot2 folders, which store temporary files related to Windows updates. Once done, I restarted the services and tried updating Windows again. Unfortunately, the error was still there.
Next, I decided to focus on the activation aspect. Sometimes, issues with activation can cause update errors. I ran the Activation Troubleshooter from Settings > Update & Security > Activation. This tool scanned for any issues related to activation and attempted to resolve them. Despite its efforts, the problem persisted.
At this point, I realized I needed a broader approach. I checked for system file corruption using the System File Checker (SFC) tool. Running this tool involves opening Command Prompt as an administrator and typing sfc /scannow. This command scans all protected system files and replaces corrupted files with a cached copy. The scan revealed some corrupt files that were successfully repaired. With renewed hope, I attempted to update Windows again, but to my dismay, the 0x80072F8F error remained.
The situation seemed increasingly dire, but I wasn’t ready to give up yet. I turned to the Microsoft community forums and user groups, searching for similar experiences and solutions. I came across advice suggesting that the issue might be related to a mismatch in system certificates or a problem with the Windows Store cache. I decided to tackle these potential problems.
For the Windows Store cache, I used the wsreset command. This command resets the Windows Store without changing account settings or deleting installed apps. I opened Command Prompt as an administrator and entered wsreset.exe. After the process completed, I restarted my computer and checked the Microsoft Store. Unfortunately, the 0x80072F8F error still appeared.
Next, I tackled the certificate issue. I navigated to the Certificate Manager by typing certmgr.msc into the Run dialog (Win + R). I checked if my system’s certificates were up to date and in good condition. There were no apparent issues, but I decided to import a fresh set of certificates anyway, just in case.
Despite these efforts, the error persisted. Feeling a bit defeated but still determined, I took the final step of performing an in-place upgrade repair of Windows 11. This process involves reinstalling Windows while keeping personal files and applications. It’s a more drastic step but often resolves deep-seated issues that other methods cannot. I downloaded the Windows 11 installation media from Microsoft’s website and used it to perform the upgrade.
The in-place upgrade process was lengthy, but it was worth the effort. After the system rebooted and I went through the initial setup, I checked for updates once more. This time, I was greeted with a successful update installation. The 0x80072F8F error was gone.
Reflecting on the experience, I realized that dealing with such issues requires a methodical approach and a willingness to explore various solutions. From checking basic settings to performing advanced troubleshooting steps, each method played a role in resolving the problem. While it was a challenging process, the satisfaction of fixing the issue and getting my system back to normal was well worth the effort.
