I remember when I first encountered the frustrating problem of high disk and memory usage while playing games on my Windows 11 PC. It was a particularly annoying issue because it was affecting not only my gaming experience but also the overall performance of my system. The high disk and memory usage were causing stuttering, lag, and in some cases, even crashes. It was a problem I needed to solve quickly to get back to enjoying my favorite games without interruptions.
The issue began after I installed a major update for Windows 11. At first, I didn’t notice anything unusual, but as I started playing more demanding games, I began to see a significant drop in performance. The games, which had previously run smoothly, now lagged and stuttered. I noticed that my disk usage was hitting 100%, and the memory usage was consistently high, even when I wasn’t running any other applications. This was particularly frustrating because my PC was supposed to handle these games with ease.
The first step I took to address this problem was to check the Task Manager to identify which processes were consuming the most resources. I opened the Task Manager by pressing Ctrl + Shift + Esc and navigated to the “Processes” tab. Here, I found that several background processes were consuming an unexpectedly high amount of disk and memory resources. Among them were some Windows services and a few third-party applications that I didn’t recognize.
One of the first things I noticed was the Windows Search service was using a significant amount of disk resources. I had heard that this service can sometimes cause issues, so I decided to temporarily disable it to see if it would improve performance. To do this, I went to the “Services” tab in Task Manager, found the Windows Search service, right-clicked on it, and selected “Stop.” I also disabled it from starting automatically by adjusting its startup type to “Disabled.”
Next, I turned my attention to the memory usage. I found that certain applications, particularly those that run in the background, were consuming a lot of memory. To address this, I uninstalled or disabled unnecessary startup programs through the “Startup” tab in Task Manager. I also ensured that I closed any applications that I didn’t need while gaming. This helped reduce the memory footprint and free up resources for my games.
Another important step I took was to check for any updates or patches for my games and the Windows operating system itself. Sometimes, high disk and memory usage can be caused by software bugs that are addressed in updates. I went to the Windows Update settings and checked for any available updates, installing them as needed. I also checked the game developer’s website or the game launcher for any available patches or updates for the games I was playing.
I also reviewed my system’s virtual memory settings. Virtual memory can be crucial for managing system performance, especially if you’re running applications that require a lot of memory. To adjust virtual memory settings, I went to the “System Properties” by right-clicking on “This PC” and selecting “Properties,” then clicked on “Advanced system settings.” Under the “Advanced” tab, I clicked on “Settings” in the Performance section, went to the “Advanced” tab, and adjusted the virtual memory settings. I set it to “Automatically manage paging file size for all drives,” which allowed Windows to handle the virtual memory configuration automatically.
Additionally, I cleaned up unnecessary files and defragmented my hard drive to improve overall performance. I used the built-in Disk Cleanup tool to remove temporary files, system cache, and other unnecessary data. To defragment the drive, I used the built-in Defragment and Optimize Drives tool, which optimized the performance of my hard drive by reorganizing fragmented data.
One more thing I did was to ensure that my system drivers were up to date, particularly the graphics drivers. Outdated or incompatible drivers can cause performance issues, so I visited the manufacturer’s website for my graphics card and downloaded the latest drivers. I installed them and rebooted my PC to see if it made a difference.
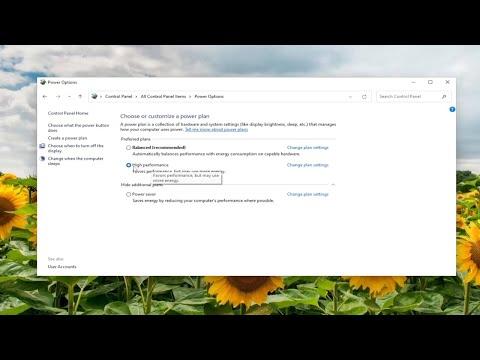
Finally, I checked the power settings of my PC. Sometimes, high disk and memory usage can be a result of power settings that are not optimized for performance. I went to the “Power & sleep” settings and made sure that my power plan was set to “High performance.” This setting helps ensure that my system is running at its full potential.
By taking these steps, I was able to address the high disk and memory usage issues I was experiencing while playing games. The performance of my games improved significantly, and I was able to enjoy a smoother gaming experience without the frustrating interruptions caused by stuttering and lag. It took a bit of trial and error, but eventually, I was able to find a solution that worked for me. If you’re facing similar issues, I hope my experience helps you resolve them and get back to enjoying your games with the performance you expect.
