I was working from home one day when the WiFi suddenly cut out. I checked my connection and saw the “No Internet, Secured” error message on my Windows laptop. Panic set in immediately. My entire workday hinged on having a stable internet connection, and now I was faced with this frustrating problem. I wasn’t sure how to fix it, so I decided to troubleshoot the issue on my own. Here’s how I managed to solve it and get back online.
The first thing I did was check the basics. I made sure my router was plugged in and turned on. Sometimes, it’s the simple things that we overlook. I noticed all the lights on my router were on, indicating that it was functioning properly. This was a good sign, but I needed to dig deeper.
I decided to restart both my router and my laptop. Restarting often resolves temporary glitches, and I hoped this would fix the issue. After turning off both devices, I waited for about a minute before turning them back on. When my laptop booted up again, I saw the same “No Internet, Secured” message. Clearly, the restart didn’t solve the problem.
Next, I turned to the Windows Network Troubleshooter. I navigated to the settings by clicking on the Start menu, selecting “Settings,” then “Network & Internet,” and finally, “Network Troubleshooter.” The troubleshooter ran a diagnostic and detected some issues with the network adapter. It recommended resetting the network adapter, so I followed the on-screen instructions. However, after the troubleshooter finished its work, the problem persisted.
Determined to resolve the issue, I delved deeper into the network settings. I opened the Control Panel by searching for it in the Start menu. Under the “Network and Sharing Center,” I clicked on “Change adapter settings.” I found my WiFi connection listed there and right-clicked on it, selecting “Properties.”
In the WiFi properties window, I noticed that the Internet Protocol Version 4 (TCP/IPv4) was selected. I clicked on “Properties” and saw that “Obtain an IP address automatically” and “Obtain DNS server address automatically” were both selected. This was correct, so I left these settings as they were. I moved on to the Internet Protocol Version 6 (TCP/IPv6) settings and made sure they were also set to obtain addresses automatically. All seemed in order here, so I moved to the next step.
I decided to update my network adapter driver. I went back to the Device Manager by searching for it in the Start menu. Under “Network adapters,” I found my WiFi adapter, right-clicked on it, and selected “Update driver.” I chose the option to search automatically for updated driver software. Windows found a new driver and installed it. After the update, I restarted my laptop, but unfortunately, the issue remained unresolved.
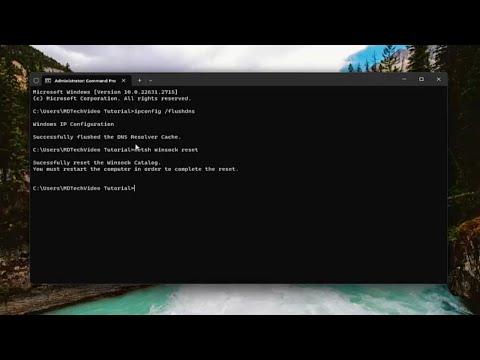
Next, I turned my attention to the command prompt. I opened it with administrative privileges by searching for “cmd” in the Start menu, right-clicking on “Command Prompt,” and selecting “Run as administrator.” I entered a series of commands to reset the network stack. First, I typed netsh winsock reset and pressed Enter. After that, I typed netsh int ip reset and pressed Enter again. These commands reset the network configuration and IP stack. Following this, I restarted my laptop once more, but the “No Internet, Secured” message still appeared.
I decided to check for Windows updates. Sometimes, a pending update can cause network issues. I went to “Settings,” then “Update & Security,” and clicked on “Check for updates.” My system found a few updates that had not been installed. I let Windows install these updates and restarted my laptop. Despite my hopes, the issue persisted.
Frustrated but not defeated, I decided to check if there were any issues with the router itself. I logged into the router’s web interface using the router’s IP address. I checked the router’s settings and saw that everything appeared to be normal. There were no error messages or warnings, and all settings seemed to be in order. I decided to reset the router to factory settings as a last resort. I pressed the reset button on the router and waited for it to reboot. Once it was back up, I reconfigured the network settings and connected my laptop again. Sadly, the problem wasn’t resolved.
Finally, I reached out to my Internet Service Provider (ISP). They ran some diagnostics on their end and confirmed that there were no outages or issues with my connection. They advised me to try connecting another device to my WiFi network to see if it experienced the same problem. I used my smartphone to connect to the network, and it worked perfectly. This indicated that the issue was specific to my laptop.
With this information, I decided to perform a system restore to a point when the internet was working fine. I accessed the System Restore tool by searching for it in the Start menu and followed the instructions to restore my system to an earlier date. After the restore process was complete, my laptop restarted, and the internet connection was back to normal.
In the end, resolving the “No Internet, Secured” error was a multifaceted process. It involved basic troubleshooting, checking network settings, updating drivers, running command prompt commands, and ultimately performing a system restore. While the issue was frustrating, I learned a lot about network troubleshooting and system maintenance along the way.
