I had always been confident in my ability to handle most computer issues on my own, but nothing prepared me for the frustration I encountered with Windows Update Error 0x80070bc2. It all started on an otherwise ordinary day. I had been working on my Windows 11 PC, diligently updating my system and installing the latest patches to ensure everything was running smoothly. Then, out of nowhere, my computer displayed a dreaded update error code: 0x80070bc2. This wasn’t just any ordinary error; it was an insidious problem that seemed determined to thwart all my attempts at resolution.
Initially, I brushed it off, thinking it was a minor glitch that would resolve itself. But as the days went by and the error persisted, it became clear that this was more than just a fleeting issue. The error prevented me from installing crucial updates, leaving my system vulnerable and potentially unstable. I knew I had to tackle this head-on before it spiraled into a more serious problem.
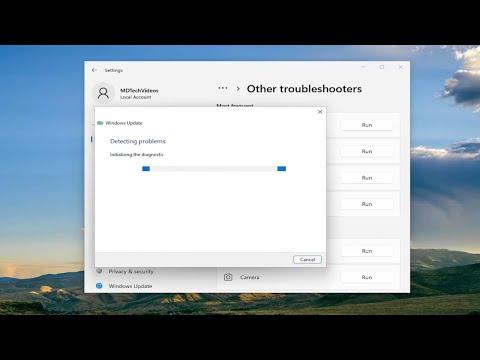
My first step was to dive into the depths of Windows troubleshooting tools. I started with the built-in Windows Update Troubleshooter. This tool has always been my go-to for resolving minor update issues. I navigated to the Settings menu, found the Troubleshoot section, and selected “Windows Update.” After a few minutes of scanning, the troubleshooter offered some generic advice and a few potential fixes. However, it was clear that the problem was more complex than what the troubleshooter could handle on its own.
Undeterred, I decided to manually reset the Windows Update components. This was a process I had read about and knew could be a bit involved. I opened Command Prompt as an administrator and began typing out a series of commands to stop various Windows Update services. Each command was executed with precision: “net stop wuauserv,” “net stop cryptSvc,” “net stop bits,” and “net stop msiserver.” After stopping these services, I proceeded to rename some critical update-related folders by using the “ren” command. I renamed “SoftwareDistribution” and “Catroot2” to “SoftwareDistribution.old” and “Catroot2.old” respectively. These folders would be recreated automatically when the services were restarted.
Once the folders were renamed, I restarted the Windows Update services with the commands “net start wuauserv,” “net start cryptSvc,” “net start bits,” and “net start msiserver.” I was hopeful that this reset would resolve the issue, but when I attempted to run the update again, the same error code reappeared. Clearly, I needed to dig deeper.
Next, I turned my attention to the Windows Update Catalog. This is a repository of updates that Microsoft maintains. I searched for the specific update that was failing to install and manually downloaded it from the catalog. Once downloaded, I attempted to install the update manually, but the error persisted. This approach was more time-consuming and required a lot of trial and error, but I was determined not to let it get the better of me.
At this point, I decided to check the Windows Update logs for more detailed information about the error. Using Event Viewer, I sifted through logs related to Windows Update and discovered some cryptic error messages that seemed to point toward problems with system files. This led me to run the System File Checker (SFC) tool. I opened Command Prompt as an administrator once again and executed the command “sfc /scannow.” The SFC tool scanned and repaired corrupted system files, which gave me a glimmer of hope. After the scan was complete, I restarted my computer and tried running the update again. The error code was still there.
Feeling somewhat exasperated but not ready to give up, I decided to use the Deployment Imaging Service and Management Tool (DISM). This tool is more advanced and can fix issues that SFC cannot. I ran the command “DISM /Online /Cleanup-Image /RestoreHealth” and let it work its magic. The process took a while, but once it was finished, I rebooted my computer and tried the update once more. The error 0x80070bc2 still loomed large on my screen.
By this point, I was beginning to wonder if a more drastic solution was needed. I made sure to back up all my important files, just in case. I then considered performing a repair install of Windows 11. This process involves reinstalling Windows while keeping personal files and applications intact. I found the appropriate installation media through the Microsoft website and began the repair process. This involved booting from the installation media, selecting the “Upgrade” option, and following the on-screen instructions.
The repair install process took some time, but once it was complete, my system was refreshed and free of the previous update errors. I attempted to run Windows Update again, and to my relief, the updates installed successfully without encountering the dreaded error code 0x80070bc2. It was a victory that felt particularly sweet after all the trials and tribulations.
In the end, resolving the Windows Update Error 0x80070bc2 required a combination of patience, persistence, and a willingness to try multiple solutions. While it was a challenging journey, I learned a great deal about troubleshooting and the various tools at my disposal. And while I hope never to encounter such an issue again, I now feel much better equipped to handle similar challenges in the future.
