Adding a contact in Gmail is a simple process that can make managing your email communication much more efficient. Whether you’re looking to keep track of your business associates, friends, or family members, adding contacts in Gmail ensures you can easily access their email addresses and communicate with them swiftly. Here’s a detailed guide on how to do it.
First, I started by opening my Gmail account on my computer. I usually find it easiest to perform tasks like this on a larger screen, so I prefer using my laptop. Once I was logged in, I looked for the Google Apps icon, which is a grid of nine dots usually located in the upper-right corner of the screen, near my profile picture. Clicking on this icon opened a menu of various Google services.
From this menu, I selected the Contacts app. This is where I can manage my contacts and view their details. If I don’t see the Contacts app listed directly, I can search for it by typing “Contacts” in the search bar of the Google Apps menu. Once I clicked on the Contacts icon, it took me to the Contacts page where I can view all the contacts I’ve previously added.
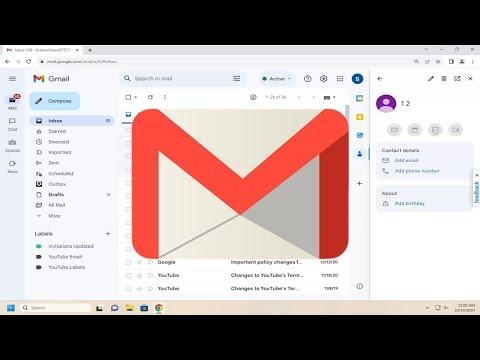
To add a new contact, I clicked on the “Create Contact” button, which is typically represented by a plus sign (+) or located in the sidebar on the left. This action opens a new form where I can input the contact’s information. The form includes fields for the contact’s name, email address, phone number, and any other details I might want to add, such as their address or a note.
I filled in the required fields for the new contact. For the name, I entered the full name of the individual. It’s helpful to include both first and last names to keep things organized. Then, I typed in the email address in the designated field. If the contact has multiple email addresses, I can add these as well by clicking on the “Add Email” option.
Next, I moved on to the phone number section. While it’s not always necessary to include a phone number, it can be useful if I need to reach the person by phone or if I want to have all their contact details in one place. After adding any additional information like the contact’s company or job title, I reviewed everything to ensure accuracy.
Once I was satisfied with the information I had entered, I clicked on the “Save” button. This action added the new contact to my Gmail account and updated my Contacts list. I could now see this person’s name and email address in my list of contacts, which makes it easier to find and email them in the future.
Additionally, if I had multiple email accounts or if I was working with a team, I could also import contacts from other email accounts or services. To do this, I clicked on the “Import” option, which allows me to upload a file containing contact information or connect with another email service to transfer contacts. This feature is especially useful if I’m transitioning from another email provider or consolidating contact lists.
I can also organize my contacts into groups. For instance, I might create separate groups for work, family, or friends. To create a new group, I went to the “Labels” section in the Contacts app. By clicking on “Create Label,” I named the label according to the group I wanted to organize, such as “Colleagues” or “Book Club.” I could then select multiple contacts and assign them to this label. This feature helps me quickly sort and access different groups of contacts.
Another useful feature is the ability to merge duplicate contacts. If I accidentally added the same contact more than once or if I have multiple entries for one person, Gmail can help clean this up. By going to the “Merge & fix” option in the Contacts menu, Gmail identifies duplicate contacts and allows me to merge them into a single entry, ensuring I have a clean and organized contact list.
Finally, if I needed to make changes to an existing contact, I could easily do so by finding the contact in my list, clicking on their name, and then selecting the “Edit” button. This allows me to update any information, add new details, or remove outdated ones. After making the changes, I clicked “Save” again to ensure the updates were applied.
By following these steps, I was able to effectively manage and organize my contacts in Gmail. This not only streamlined my communication but also helped me maintain a well-organized address book, making it easier to stay connected with everyone I need to reach.