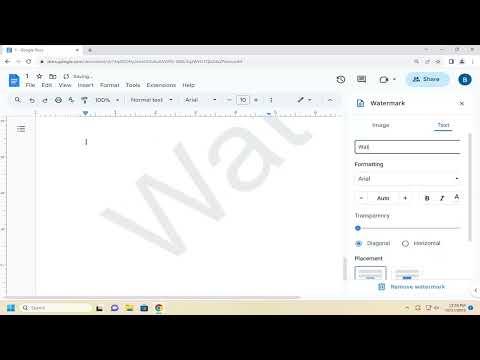
I remember the day I first stumbled upon the need to add a watermark to a document I was working on in Google Docs. I was deep into preparing a presentation for an important business meeting. The document contained sensitive information, and I wanted to ensure that it remained protected and clearly marked as confidential. I had heard about watermarks in other programs like Microsoft Word, but I was unsure if Google Docs, my go-to tool for document creation, supported this feature.
As I started researching, I quickly realized that Google Docs does not have a built-in watermark feature like some other word processors. This discovery initially felt like a setback. However, I wasn’t about to let this stop me. Instead, I decided to find a workaround that would let me add a watermark to my Google Docs document. I knew it would take a bit of creativity and some extra steps, but I was determined to get it done.
I began by exploring various methods and tools that could help me achieve my goal. The first method I tried involved creating a watermark manually using Google Drawings, which is a feature available in Google Docs. Here’s how I approached it:
-
Creating a Watermark Using Google Drawings: I started by opening a new Google Drawing from the Google Docs menu. I went to “Insert” and then selected “Drawing” and “New.” In the Drawing window, I used the text box tool to add the text I wanted for my watermark. I chose a light, transparent color for the text to ensure it wouldn’t overpower the content of the document. Once I was satisfied with the design, I clicked “Save and Close” to insert the drawing into my document.
-
Adjusting the Watermark: After inserting the drawing, I realized it needed some adjustments to fit seamlessly into the background. I clicked on the watermark drawing to select it and then used the handles to resize and position it as needed. I also right-clicked on the watermark and selected “Order” to send it behind the text, ensuring that my document content remained readable.
-
Using Transparent Images for a Watermark: For a more polished look, I decided to use a transparent image as my watermark. I created a simple watermark image using a graphic design tool like Canva or Photoshop. I made sure the image had a transparent background and saved it in a format that supports transparency, such as PNG. I then went back to my Google Docs document, clicked on “Insert,” selected “Image,” and uploaded my watermark image. After inserting the image, I adjusted its size and position, and set its transparency level using the image options.
-
Placing the Watermark on Each Page: One challenge I faced was ensuring the watermark appeared on every page of my document. I initially inserted the watermark into the header or footer of my document, which worked for the first page but didn’t automatically carry over to subsequent pages. To address this, I copied and pasted the watermark onto each page manually. Although this was a bit tedious, it ensured that the watermark was visible throughout the document.
-
Saving and Sharing the Document: Once I was satisfied with the placement and appearance of the watermark, I saved the document and was ready to share it. I exported the Google Docs file as a PDF to preserve the formatting and watermark. This step was crucial because it ensured that the watermark remained intact and visible when the document was opened by others.
Through this process, I learned that while Google Docs doesn’t offer a native watermark feature, there are effective workarounds that can achieve similar results. Although it required some extra steps and creativity, I was able to protect my document and clearly mark it as confidential.
Looking back, I’m glad I took the time to figure out how to add a watermark to my Google Docs document. It not only helped me safeguard sensitive information but also provided me with a useful skill for future projects. I now feel more confident in my ability to navigate and manipulate Google Docs to meet my specific needs, even when the tool doesn’t offer an out-of-the-box solution.
