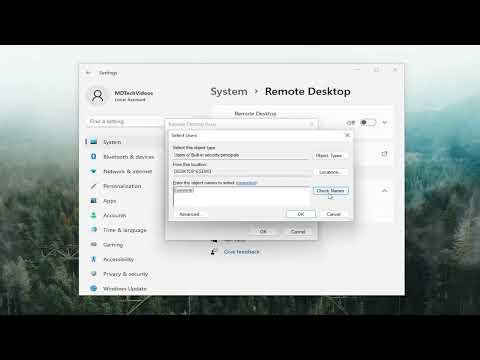
Managing Remote Desktop users in Windows 10 and Windows 11 is a straightforward task, but it’s essential to follow the correct procedures to ensure that only authorized users have access to your system. In this tutorial, I’ll guide you through the process of adding and removing Remote Desktop users on both Windows 10 and Windows 11.First, I’ll explain how to add a user to the Remote Desktop group, which grants them permission to connect to your computer via Remote Desktop. This process is generally similar across both Windows 10 and Windows 11, with only slight differences in the interface between the two versions.To start, I accessed the System Properties dialog by right-clicking on the Start button and selecting “System.” Alternatively, I could also use the search function to type in “System” and click on the “System” option from the results. Once in the System window, I clicked on “Remote Desktop” in the left-hand menu. This took me to the Remote Desktop settings page where I found the option to enable Remote Desktop if it wasn’t already turned on. I made sure to toggle the switch to “On” to allow connections.Next, I clicked on “Advanced settings” to open additional options. Under the “Advanced” tab, I made sure that the setting for Network Level Authentication was enabled. This is a security feature that ensures that only authenticated users can access the system. With this setting enabled, I could be sure that unauthorized users would be prevented from accessing my computer.With Remote Desktop enabled, I moved on to add users. I went back to the main Remote Desktop settings page and clicked on “Select users that can remotely access this PC.” This action opened a window titled “Remote Desktop Users.” In this window, I clicked on the “Add” button to start the process of adding a new user.A dialog box appeared where I needed to enter the user’s name. Since I was adding a user who is part of the same network, I could simply type their username and click “Check Names” to verify their account. If the username was correct, it would be underlined. Once confirmed, I clicked “OK” to add the user to the list. I repeated this process for any additional users I wanted to grant access to.After adding users, I ensured that the changes were saved and closed all open windows. This setup allowed the specified users to connect to my PC remotely using their credentials.If I needed to remove a Remote Desktop user, the procedure was quite similar. I started by returning to the “Remote Desktop Users” window where I had previously added users. Here, I selected the user I wanted to remove from the list and clicked on “Remove.” This action took the user off the list of those who had permission to access my computer via Remote Desktop. After removing the user, I clicked “OK” to apply the changes and closed all the windows.One important thing to remember is that removing a user from this list does not delete their account from the system. It only revokes their Remote Desktop access. If I needed to remove the user’s account entirely from my system, I would need to do this through the “User Accounts” settings.For more advanced scenarios, such as managing users across multiple computers in a network environment, or if you’re using a domain, the process might involve more steps or different tools. In these cases, using Group Policy or Active Directory might be necessary to manage Remote Desktop permissions on a larger scale.It’s also worth noting that Remote Desktop access can be a security risk if not managed properly. Always ensure that users who are granted access have a legitimate need to connect remotely and that strong passwords are used. Regularly reviewing and updating your Remote Desktop user list can help maintain security and prevent unauthorized access.In summary, adding and removing Remote Desktop users in Windows 10 and Windows 11 involves a few simple steps that can be done through the system settings. By enabling Remote Desktop, configuring network level authentication, and managing user permissions through the Remote Desktop Users dialog, I was able to efficiently control who had access to my computer remotely. Whether you are managing a single machine or a network of computers, these steps ensure that your system remains secure while providing the necessary access to authorized users.
How to Add or Remove Remote Desktop Users in Windows 11/10 [Tutorial]
