When I first encountered the issue of blocking an application from accessing the internet on Windows 11, I was genuinely perplexed. It all started on a quiet Sunday afternoon when I was working on a project that required a stable and uninterrupted connection. Despite my best efforts, I noticed that one of the applications on my computer was consuming an unexpected amount of bandwidth. This was not ideal, especially given that my internet speed was limited.
The application in question was an innocuous-looking weather app that I had installed a few months ago. Initially, it seemed harmless, but as time went on, I realized it was pulling data more frequently than necessary. This constant data access was not only consuming my bandwidth but also affecting the performance of other essential applications. My frustration grew as I tried to find a solution.
I started my quest to block this application from accessing the internet by exploring various methods. My initial thought was to look for an in-app setting that might allow me to limit its internet access. Unfortunately, this application did not offer such an option. With no direct solution available, I turned to the Windows Firewall, which seemed like the ultimate tool for this task.
I delved into the Windows Firewall settings to find a way to block the application. Here’s a step-by-step guide of how I managed to achieve this:
-
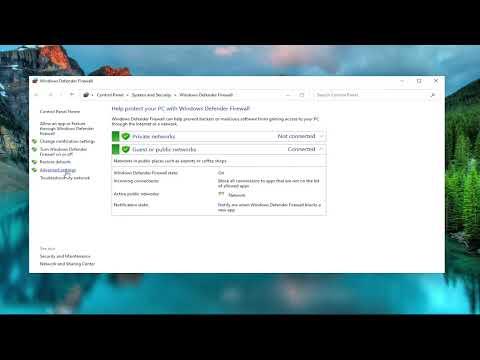
Opening Windows Firewall Settings: I began by opening the Start menu and typing “Windows Security” into the search bar. After clicking on it, I navigated to the “Firewall & network protection” section.
-
Accessing Advanced Settings: Within the Firewall & network protection menu, I clicked on “Advanced settings” to access the advanced firewall settings. This led me to the Windows Defender Firewall with Advanced Security window.
-
Creating a New Rule: On the left side of the advanced security window, I selected “Outbound Rules.” This allowed me to control which applications were allowed to send data out of my computer. I then clicked on “New Rule…” on the right side.
-
Configuring the Rule: In the new rule wizard, I chose “Program” and clicked “Next.” I was prompted to specify the path of the executable file for the application I wanted to block. After locating and selecting the file, I clicked “Next” again.
-
Blocking the Connection: The next screen asked what action I wanted to take. I selected “Block the connection” and proceeded. This option would ensure that the application would no longer be able to access the internet.
-
Applying the Rule: I was then asked to specify when this rule would apply. I left the default selections (Domain, Private, and Public) checked to ensure the rule would be effective regardless of my network type. After clicking “Next,” I gave the rule a name (something like “Block Weather App”) and clicked “Finish.”
-
Verifying the Rule: To ensure the rule was properly applied, I returned to the “Outbound Rules” list and found the rule I had created. I verified that it was enabled and correctly configured.
After setting up the rule, I monitored the application to confirm it no longer accessed the internet. My network activity improved significantly, and I could focus on my project without worrying about unexpected bandwidth consumption.
This process demonstrated the power and flexibility of the Windows Firewall. While initially daunting, the ability to fine-tune network access for specific applications proved invaluable. Not only did I solve my immediate problem, but I also gained a better understanding of how to manage my network settings in the future.
Overall, this experience taught me the importance of knowing how to control application permissions on my computer. Whether it’s for managing bandwidth or ensuring privacy, mastering these settings allows for a more efficient and secure computing experience.
