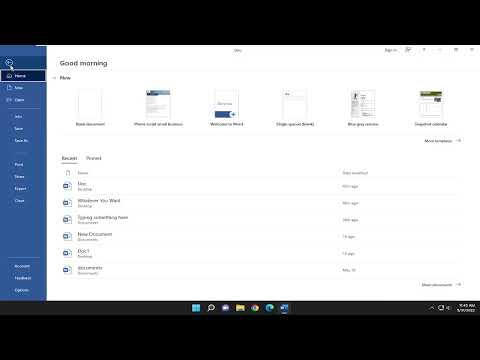
I recently needed to adjust the AutoSave settings in Microsoft Office applications like Word, Excel, and PowerPoint. It was crucial for my workflow, especially because I wanted to ensure that my documents were saved more frequently to avoid losing any unsaved work during unexpected disruptions, such as power outages or system crashes. Here’s a step-by-step guide on how I changed the AutoSave time in these applications.First, let’s talk about Microsoft Word. I opened the application and went to the “File” tab in the upper left corner. From there, I clicked on “Options” which is usually located near the bottom of the menu. This action opened the Word Options dialog box. I then selected “Save” from the list of options on the left. In the Save section, I looked for the “Save AutoRecover information every” setting. By default, this is typically set to 10 minutes. To change it, I clicked on the small arrow next to the number to open a drop-down menu and selected the interval that suited my needs better. I could choose from intervals such as 1 minute, 5 minutes, or any other option available. After selecting the desired time, I clicked “OK” to apply the changes. This adjustment ensured that Word would save my document more frequently, reducing the risk of losing work in case of a problem.Next, I repeated a similar process for Microsoft Excel. I opened Excel and again navigated to the “File” tab. From the File menu, I clicked on “Options” to bring up the Excel Options dialog box. I selected “Save” from the menu on the left side. Here, I found the “Save AutoRecover information every” option, which, like in Word, is set to 10 minutes by default. I changed this setting by clicking on the drop-down arrow next to the number and selecting a shorter interval that fit my needs. After making my selection, I clicked “OK” to save the changes. This step was crucial because Excel is often used for data analysis and calculations, and losing data due to infrequent saves could be problematic.Finally, I adjusted the AutoSave time in Microsoft PowerPoint. I opened PowerPoint and went to the “File” tab, just as I did with Word and Excel. I clicked on “Options” to access the PowerPoint Options dialog box. I then selected “Save” from the list of options. I looked for the “Save AutoRecover information every” setting, which defaults to 10 minutes as well. I adjusted this by clicking the drop-down arrow next to the time and choosing the interval that I preferred. Once I made my selection, I clicked “OK” to apply the changes. This ensured that my presentations were saved more frequently, which is especially helpful during long editing sessions.By adjusting the AutoSave intervals in Word, Excel, and PowerPoint, I felt more secure about my work being saved regularly. This was particularly important during times when I was working on complex documents or presentations that involved a lot of data or creative content. I found that frequent AutoSaves helped to minimize the risk of losing work and reduced the stress associated with the potential loss of unsaved changes.It’s worth noting that while AutoSave is a fantastic feature for protecting your work, it’s still important to manually save your documents periodically, especially before making major changes. This manual save provides an additional layer of security and ensures that all your recent changes are captured.Overall, changing the AutoSave time in Microsoft Office applications is a straightforward process that can greatly enhance your productivity and peace of mind. By setting a shorter interval for AutoSave, I made sure that my documents, spreadsheets, and presentations were preserved more frequently, which ultimately allowed me to focus more on my work without worrying about potential data loss.
How to Change AutoSave Time in Microsoft Word, Excel & PPT [Tutorial]
