Changing the computer name in Windows XP is a straightforward process that can be accomplished in just a few steps. This guide will walk you through the entire procedure to ensure your computer is correctly renamed. Let’s get started.
Firstly, you’ll need to access the system properties of your computer. To do this, click on the “Start” menu located at the bottom-left corner of your screen. From the Start menu, navigate to “Control Panel” and click on it to open.
In the Control Panel window, you will see several icons representing different system settings. Look for an icon labeled “System” and double-click it. This action will open the System Properties window. If you are in the Classic View of Control Panel, you will find the “System” icon easily; however, if you are in the Category View, you might need to click on “Performance and Maintenance” first to access the “System” icon.
Once the System Properties window is open, you’ll be on the “General” tab by default. This tab displays basic information about your computer, such as the operating system version, computer model, and processor type. To change the computer name, you need to switch to the “Computer Name” tab. You can find this tab next to the “General” tab at the top of the System Properties window.
Click on the “Computer Name” tab to reveal the options for changing your computer’s name. You will see a section labeled “Computer name,” which displays the current name of your computer. Below this, there is a button labeled “Change.” Click on this button to begin the renaming process.
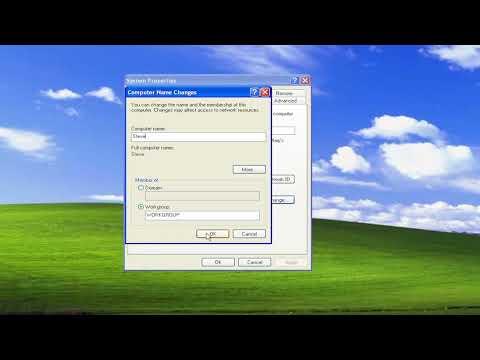
After clicking “Change,” a new window will appear, allowing you to enter a new computer name. The field labeled “Computer name” is where you should type the new name you want for your computer. Keep in mind that computer names in Windows XP must be unique on your network and can contain letters, numbers, and hyphens but cannot have spaces. Make sure the name you choose is easy to remember and reflects the purpose of the computer if possible.
In addition to changing the computer name, you might also see an option to change the computer’s workgroup name. The workgroup is a group of computers on a network that share resources. If you need to change the workgroup name, you can do so in this window, but if you are only interested in changing the computer name, you can leave the workgroup settings as they are.
After entering the new name for your computer, click “OK” to confirm the change. Windows XP will then prompt you to restart your computer for the changes to take effect. You can either choose to restart immediately by clicking “Yes” or delay the restart by clicking “No” and doing it later. It’s generally a good idea to restart your computer as soon as possible to ensure that all settings are updated correctly.
Once your computer restarts, the new name you have chosen will be applied. You can verify the change by going back to the System Properties window and checking the “Computer Name” tab. The new name should be displayed there.
Changing your computer’s name can be helpful in various situations. For example, if you are setting up a new network and want each computer to have a distinct name, or if you simply want a more personalized name for your computer, this process will make those adjustments easy to implement.
If you are managing multiple computers on a network, it’s important to ensure that each computer has a unique name to avoid confusion and potential network issues. A clear and descriptive computer name helps with identifying and managing computers more efficiently, especially in environments with numerous devices.
In conclusion, renaming your computer in Windows XP is a simple task that involves navigating through the Control Panel, accessing the System Properties, and updating the computer name in the “Computer Name” tab. By following these steps, you can easily assign a new name to your computer, which can be beneficial for organization and network management. Whether you are setting up a new computer or reconfiguring an existing one, this process ensures that your computer’s name reflects your preferences and needs.
