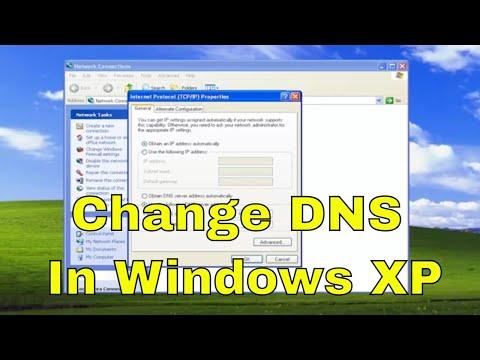
One evening, while working on my old but reliable Windows XP machine, I encountered an unusual issue. My internet connection, which had been functioning flawlessly for years, suddenly began to slow down to a crawl. Websites took forever to load, and streaming videos were choppy at best. Frustrated, I decided to investigate the problem. After a few hours of troubleshooting, I suspected that the issue might be related to the DNS (Domain Name System) servers my computer was using. Changing the DNS servers can often resolve issues related to slow internet or connectivity problems, so I set out to change them on my Windows XP machine.
The first step in resolving this problem was to understand what DNS servers are and how they impact my internet connection. DNS servers are like the phone book of the internet. When I enter a website address, like “www.example.com,” the DNS server translates that into an IP address that my computer can understand and use to connect to the website. Sometimes, the default DNS servers provided by my Internet Service Provider (ISP) might not be the most efficient or reliable. That’s why changing them to a more reliable or faster DNS server can make a significant difference in my browsing experience.
To change the DNS servers on my Windows XP machine, I began by accessing the network settings. Here’s how I did it:
-
Open the Network Connections Window:
I clicked on the “Start” menu, then selected “Control Panel.” In the Control Panel, I found and clicked on “Network and Internet Connections,” and then clicked on “Network Connections.” This action opened a window showing all the network connections on my computer. -
Access the Properties of the Active Network Connection:
In the Network Connections window, I located the connection that was actively being used (whether it was a LAN connection or a dial-up connection). I right-clicked on this connection and selected “Properties” from the context menu. -
Select the Internet Protocol (TCP/IP) Properties:
In the Properties window for the selected connection, I looked for an entry labeled “Internet Protocol (TCP/IP)” in the list of items used by the connection. I clicked on this entry to highlight it and then clicked the “Properties” button. -
Change the DNS Server Addresses:
In the Internet Protocol (TCP/IP) Properties window, I saw options for configuring the IP address and DNS server addresses. I selected the option labeled “Use the following DNS server addresses” to manually specify DNS servers.I needed to enter the new DNS server addresses that I wanted to use. For this tutorial, I decided to use Google’s public DNS servers, which are known for their reliability and speed. Google’s DNS server addresses are:
- Primary DNS server: 8.8.8.8
- Secondary DNS server: 8.8.4.4
I entered these addresses into the respective fields:
- For the “Preferred DNS server,” I typed 8.8.8.8.
- For the “Alternate DNS server,” I typed 8.8.4.4.
-
Save the Changes:
After entering the new DNS server addresses, I clicked “OK” to close the Internet Protocol (TCP/IP) Properties window. I then clicked “OK” again in the Properties window for my network connection to apply the changes. -
Restart the Network Connection:
To ensure that the changes took effect, I disabled and then re-enabled the network connection. I right-clicked on the network connection in the Network Connections window and selected “Disable.” After a few moments, I right-clicked the connection again and selected “Enable.” -
Verify the Changes:
To confirm that the new DNS servers were in use, I opened the Command Prompt by clicking “Start,” selecting “Run,” and typingcmdbefore pressing Enter. In the Command Prompt window, I typedipconfig /alland pressed Enter. I reviewed the output to ensure that the DNS servers listed were the new ones I had entered (8.8.8.8 and 8.8.4.4). -
Test the Internet Connection:
Finally, I tested my internet connection by browsing a few websites to check if there was any improvement in speed and reliability. To my relief, the websites loaded much faster, and the streaming issues were resolved.
Changing the DNS servers on my Windows XP machine turned out to be a straightforward process, but it made a significant difference in my internet experience. By switching to Google’s DNS servers, I was able to overcome the connectivity issues that had been plaguing my system. This simple adjustment restored my machine’s performance and allowed me to get back to enjoying a smooth and fast browsing experience. If anyone else is struggling with similar internet issues on an older system like Windows XP, this approach might just be the solution they need.
