I found myself grappling with an issue that I never anticipated would be so complex. It all began when my company decided to enhance our data security measures, which involved tightening the encryption protocols for file sharing connections. The task seemed straightforward at first—update our encryption settings in Windows 10. However, as I delved deeper into the process, I realized that the ultimate challenge lay in navigating the various settings and ensuring that every file transfer adhered to the new encryption standards.
The problem started innocuously enough. I was working on a routine file-sharing task when I noticed a notification about outdated security settings. A quick check revealed that the encryption methods used for file sharing connections were no longer considered secure by our updated security policies. With the transition to Windows 11 on the horizon, it was clear that I needed to update the encryption settings to align with the latest security protocols. I had no idea how intricate this process would be.
Initially, I tried to follow the built-in help guides, but they were too generic and didn’t address the specific needs of changing encryption settings in a way that would satisfy our new security requirements. I needed a step-by-step guide that would help me navigate through the different encryption options and configure them correctly. The more I explored, the more I realized how essential it was to handle this task with precision, as any misconfiguration could potentially expose our files to security vulnerabilities.
After doing extensive research, I discovered that changing encryption settings in Windows 10 and Windows 11 involved several critical steps. First, I had to access the Local Group Policy Editor to modify the encryption protocols used for file sharing. To do this, I pressed Win + R to open the Run dialog, typed gpedit.msc, and hit Enter. This opened the Local Group Policy Editor where I navigated to Computer Configuration > Administrative Templates > Network > Network Security > LAN Manager Authentication Level.
Here, I found the setting named “Send LM & NTLM – use NTLMv2 session security if negotiated.” By default, this was set to “Not Configured” or sometimes “Send LM & NTLM.” I changed this setting to “Send NTLMv2 response only. Refuse LM & NTLM,” which enforced the use of NTLMv2 authentication and thereby improved the encryption level.
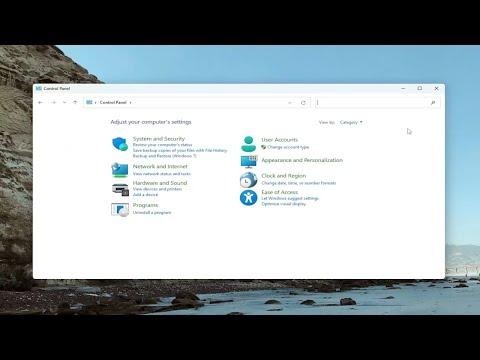
Next, I needed to adjust the settings for file sharing specifically. I went to the Control Panel and selected “Network and Sharing Center.” From there, I clicked on “Change advanced sharing settings.” Under the Private network profile, I ensured that “Turn on network discovery” and “Turn on file and printer sharing” were enabled. These settings are crucial for allowing file sharing while maintaining a secure network environment.
To further enhance security, I updated the sharing options for specific folders. I right-clicked on the folder I wanted to share, selected “Properties,” and then navigated to the “Sharing” tab. I clicked on “Advanced Sharing” and checked the “Share this folder” box. Next, I clicked on “Permissions” and ensured that the permissions were set correctly—only allowing access to users who needed it and ensuring that encryption was enforced during the sharing process.
As I moved forward, I also ensured that the encryption settings for the underlying file system were updated. For this, I used BitLocker, which is a built-in encryption feature in Windows. I went to “Control Panel,” selected “System and Security,” and then “BitLocker Drive Encryption.” I enabled BitLocker for the drives that contained sensitive files. This step ensured that even if the encryption settings for file sharing were bypassed, the files would remain secure due to the drive encryption.
Finally, I reviewed all the settings to ensure they were applied correctly and tested file transfers to verify that the new encryption protocols were working as intended. It was crucial to test this thoroughly to confirm that our new security measures were effective and that no issues arose during file sharing.
In conclusion, what seemed like a simple task of updating encryption settings turned out to be a detailed process requiring careful adjustments and thorough testing. By following these steps, I was able to enhance the security of our file sharing connections and align with the latest encryption standards. The experience taught me the importance of diligence and attention to detail in managing security settings, and it gave me a deeper understanding of how encryption works to protect sensitive data in Windows environments.