One day, as I was working on my laptop, I noticed that the text on some websites appeared much smaller than usual, and I had to constantly zoom in and out to make it readable. It was incredibly frustrating because I was used to having everything display at a comfortable size without having to fiddle with settings every time. I realized that this issue was becoming a significant hindrance to my productivity and decided to take matters into my own hands.
After a bit of research, I discovered that the problem was related to Google Chrome’s default zoom settings. It turned out that Chrome allows users to adjust the zoom level for individual websites, but I needed a way to set a default zoom level for all sites so I wouldn’t have to manually adjust it each time. This discovery led me on a journey to find a solution that would fix this problem permanently.
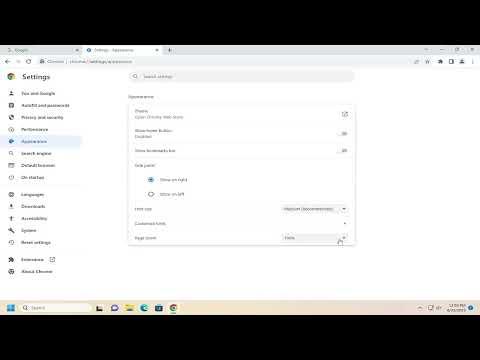
First, I navigated to Google Chrome and clicked on the three vertical dots in the upper-right corner of the browser window to open the menu. From there, I selected “Settings,” which opened a new tab with a range of options. I scrolled down to the “Appearance” section, where I saw a setting labeled “Page Zoom.” This setting was exactly what I needed.
By clicking on the drop-down menu next to “Page Zoom,” I was able to select my preferred zoom level. I chose 125% because it made the text and images on most websites comfortable to view without feeling too zoomed in. Once I set this zoom level, Chrome applied it to all websites by default. I tested this by opening a few different sites, and sure enough, the new zoom level was consistently applied.
To ensure that this change would stick, I restarted Chrome and checked the zoom level again on various websites. Everything was displaying perfectly at the 125% zoom level. It was a relief to see that the adjustment had resolved my issue, and I no longer had to deal with the constant zooming.
For those who might face a similar problem, here’s a detailed guide on how to change Google Chrome’s default zoom settings:
- Open Google Chrome and click on the three vertical dots in the top-right corner to access the menu.
- Select “Settings” from the dropdown list.
- Scroll down to the “Appearance” section.
- Find the “Page Zoom” option and click on the drop-down menu next to it.
- Choose your preferred zoom level from the options provided (e.g., 100%, 125%, 150%, etc.).
- Close the settings tab and refresh any open websites to see the changes applied.
If you find that some websites are still not displaying correctly, you can always adjust the zoom level for individual sites by using the zoom controls located in the address bar. Simply click on the three dots next to the site URL and select the zoom level you need.
This process may seem simple, but it had a profound impact on my browsing experience. It allowed me to work more efficiently and comfortably, without the constant need to adjust settings. By setting a default zoom level, I was able to enhance my productivity and make my online activities much more enjoyable.
Changing Chrome’s default zoom settings is a small adjustment that can make a big difference in how you interact with the web. It’s a perfect example of how a little bit of customization can lead to a significantly improved user experience. For anyone encountering similar issues, I highly recommend following the steps above to resolve the problem and enhance your browsing comfort.