It all began on a regular Tuesday afternoon. I had just upgraded my laptop to Windows 11, excited to explore the new features and enjoy a more streamlined interface. I was working on an important project and needed to make sure my system settings were perfectly tuned for my needs. However, I soon realized that my computer’s language, region, time, and date settings were all wrong. My laptop defaulted to settings from a previous location, and I needed to adjust everything to match my current setup. At first, I was a bit flustered and unsure where to start, but it turned out to be simpler than I initially thought.
I decided to take matters into my own hands and figured I’d walk through the steps to change the language, region, time, and date settings in Windows 11. The first thing I did was open the Settings app. I clicked on the Start menu and selected the gear icon to open the Settings. If you’re having trouble finding it, you can also press the Windows key + I to open Settings directly.
Once in the Settings menu, I noticed that the interface was quite intuitive. The next step was to address the language settings. I clicked on “Time & language” from the sidebar on the left, and then selected “Language & region.” Here, I found options to add a new language or change the display language of Windows. I noticed that my current display language was set to something other than English, so I clicked on the dropdown menu under “Windows display language” and chose English from the list. Windows 11 prompted me to sign out and sign back in for the changes to take effect. After signing back in, everything was in English, which made it much easier for me to continue with my work.
Next, I focused on the region settings. Still within the “Language & region” section, I found the “Region” dropdown menu. I clicked on it and selected my current region. This change adjusted various settings, including regional formats like date and time formats. If you’re in a different country or region, make sure to select the one that matches your current location to ensure that all formats align with local conventions.
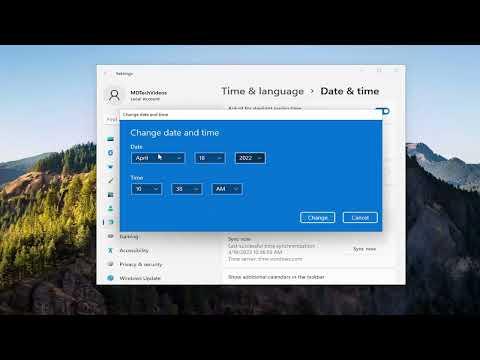
Adjusting the time and date settings was the final step in my process. To access these settings, I returned to the main Settings menu and selected “Time & language” again, but this time I chose “Date & time.” Here, I could toggle automatic settings for time and date or set them manually. Since I prefer to keep everything synced automatically, I made sure the “Set time automatically” and “Set time zone automatically” options were turned on. This allowed Windows to adjust the time and date based on my current location. I double-checked that the time zone was correct; if it wasn’t, I could manually select my time zone from the dropdown menu.
Once I had completed these changes, I felt a sense of relief. My laptop was now set up according to my preferences, and everything seemed to be working smoothly. I resumed my project, knowing that the settings were properly configured. It was a great reminder of how small adjustments can make a big difference in ensuring that my work environment is perfectly suited to my needs.
Reflecting on the process, I appreciated how Windows 11 made it relatively straightforward to modify these settings. The user-friendly interface allowed me to make changes without having to dig through complex menus or settings. For anyone else facing similar issues, I’d say not to worry. With a few simple clicks, you can ensure that your language, region, time, and date settings are perfectly aligned with your needs, making your computing experience much more pleasant and efficient.