I remember the day clearly when I first encountered the issue with Google Docs’ page settings. I had just started working on a project that involved preparing a detailed report. I was thrilled about the project and eager to get started, but as soon as I began formatting my document, I realized that the page settings were not quite right. I wanted to adjust the margins, set a specific paper size, and make sure the orientation was perfect. It seemed like a straightforward task, but I found myself tangled in a web of menus and options that were not as intuitive as I had hoped.
Initially, I felt a bit overwhelmed. I knew that Google Docs offered a range of formatting options, but I wasn’t familiar with where to find them or how to use them effectively. I had always used default settings, so this was a new challenge. My first instinct was to dive into the settings, but I quickly realized that I needed a clear guide to navigate through the process.
The ultimate goal was to get my document looking just right. I started by opening my Google Docs document. I needed to make sure that I was in the right place to begin changing the settings. To my surprise, the page settings weren’t immediately visible. I had to delve into the menu options to find where these settings were hidden.
My first step was to locate the ‘File’ menu at the top-left corner of the screen. I clicked on it, expecting to see options related to page setup. Sure enough, there was an option labeled ‘Page setup’. This was the key I needed. Clicking on ‘Page setup’ opened a dialog box where I could make several adjustments.
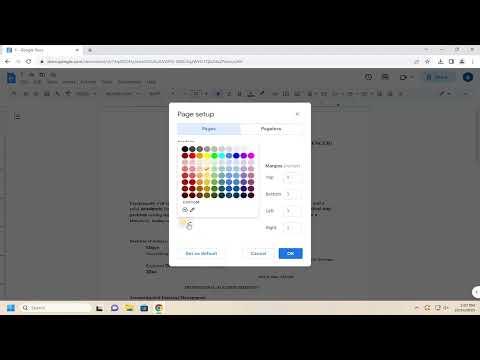
In the Page setup dialog box, I found several tabs and fields. The first field that caught my attention was the ‘Margins’ section. Here, I could set the top, bottom, left, and right margins of the page. I wanted to customize these margins to fit the specific requirements of my project. After adjusting the margins to the desired measurements, I moved on to the next settings.
Next, I turned my attention to the ‘Paper size’ option. This was crucial because my project required a specific paper size that was different from the default letter size. I clicked on the dropdown menu under ‘Paper size’ and saw a list of available sizes. I selected the size that matched my project’s requirements, which was an A4 size paper.
Orientation was the next setting I had to adjust. Google Docs allows you to choose between ‘Portrait’ and ‘Landscape’ orientation. Since my report required a landscape orientation, I selected that option from the orientation section. This change was important to ensure that my content would fit well on the page and be presented as intended.
Another aspect I needed to address was the ‘Page color’. Although it wasn’t as crucial as the margins, paper size, and orientation, I wanted to change the background color of the page for a better visual appeal. I clicked on the ‘Page color’ option and selected a subtle shade that complemented the design of my report.
Once I had made all the necessary changes, I clicked on the ‘OK’ button to apply the new settings to my document. It was a relief to see that all the adjustments I had made were reflected in my document immediately. The margins, paper size, orientation, and page color were now exactly how I wanted them to be.
The process wasn’t as complicated as I initially thought, but it did require a bit of exploration and understanding of where to find the right settings. By following these steps, I was able to customize my document to fit my project’s requirements perfectly.
In summary, changing page settings in Google Docs involves accessing the ‘Page setup’ dialog box through the ‘File’ menu. From there, you can adjust margins, paper size, orientation, and page color according to your needs. Although it might seem daunting at first, with a bit of exploration, you can easily make the necessary adjustments to get your document looking just right.
