I remember the day I encountered a frustrating issue with my HP printer’s paper margin settings. I had just started a project for work that involved printing a large batch of documents, and I needed the margins adjusted to fit everything neatly on the pages. My HP printer, which had always been reliable up until then, suddenly seemed to be causing more problems than it was worth.
The problem started when I noticed that my printed documents had inconsistent margins. Some pages had large blank spaces on the sides, while others had text that was too close to the edge of the paper. I initially thought it was a problem with the document layout, but after checking everything multiple times, I realized that the issue was with the printer settings themselves. I had to get the margins just right, so I dove into figuring out how to change the paper margin size on my HP printer.
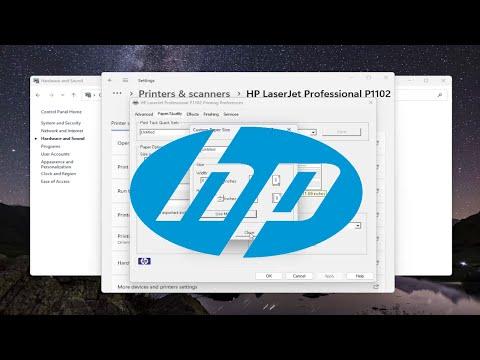
First, I began by accessing the printer settings through my computer. I opened the Control Panel and navigated to ‘Devices and Printers.’ After locating my HP printer from the list of available devices, I right-clicked on it and selected ‘Printing Preferences.’ This took me to a new window with various settings related to print jobs.
Within the ‘Printing Preferences’ window, I found a tab labeled ‘Paper/Quality.’ I clicked on it, hoping to find options for adjusting margins. To my surprise, there were no direct options for changing the margins here. Instead, the settings mostly dealt with paper size, type, and print quality. Realizing I needed a different approach, I decided to check the HP printer’s software that was installed on my computer. Many HP printers come with dedicated software that can offer more in-depth customization options.
I opened the HP Smart app, which is a utility designed to manage HP printers. The app provided a more user-friendly interface and seemed like a promising place to adjust my settings. I navigated to the ‘Print’ section and selected ‘Manage Settings.’ Here, I found an option for ‘Document Settings,’ where I hoped to find margin adjustments.
In the ‘Document Settings’ section, there was a sub-menu for ‘Page Layout.’ This menu allowed me to adjust the layout for documents, including margins. I was relieved to find this feature. However, it was not as straightforward as I had hoped. The margin settings were actually located under a submenu called ‘Advanced Options,’ which was not immediately visible.
Once I accessed the ‘Advanced Options,’ I found settings for top, bottom, left, and right margins. I adjusted these values according to my needs. For instance, if I needed a smaller top margin to fit more content on the page, I would reduce the value in the ‘Top Margin’ field. Similarly, I adjusted the other margins to ensure everything was aligned correctly.
After making the adjustments, I saved the settings and printed a test page to verify that the margins were now correct. The test page showed that the changes had taken effect, and the margins were exactly as I needed them to be. This was a huge relief, as it meant I could proceed with printing the entire batch of documents without further issues.
However, the process didn’t end there. I noticed that the margins I had set were not being applied consistently across different types of documents. It seemed that some applications had their own margin settings that could override the printer’s default settings. To address this, I had to ensure that the document settings in the application I was using (like Microsoft Word or Adobe PDF) matched the printer settings.
In Microsoft Word, for example, I went to the ‘Layout’ tab and clicked on ‘Margins.’ Here, I made sure to set the margins to match what I had configured in the HP printer settings. This way, the document layout would align with the printer’s margin settings, ensuring a uniform appearance in the final printout.
Similarly, in Adobe PDF, I accessed the print dialog and checked the ‘Page Setup’ options. I made sure that the margins set in the PDF document matched those in the printer settings. This step was crucial to avoid discrepancies between what was displayed on the screen and what was printed on paper.
Through this entire experience, I learned that changing paper margin sizes on an HP printer involves more than just adjusting settings on the printer itself. It requires a coordinated effort between the printer’s settings, the document’s layout, and the application used to create the document. By carefully managing each of these aspects, I was able to achieve the precise margins I needed and avoid any further printing issues.
In conclusion, while it took a bit of troubleshooting and adjustments, I was ultimately able to resolve the margin issues with my HP printer. It was a good reminder of how interconnected different elements of the printing process can be. If you ever face a similar problem, remember to check both your printer settings and the document settings to ensure everything aligns perfectly.