I never imagined that a seemingly simple task could become such a frustrating ordeal. It all started one morning when I needed to print a large number of documents for an important meeting. I was confident it would be a smooth process. I had recently acquired a Brother printer, which I’d heard was reliable and efficient. However, what began as an ordinary printing job quickly escalated into a full-blown dilemma when I realized I couldn’t figure out how to change the paper settings on my PC for the Brother printer.
It all began when I tried to print a variety of documents, some on letter-sized paper and others on legal-sized paper. The printer, though efficient, seemed to be struggling with the different paper sizes. Documents intended for legal-sized paper were being printed on letter-sized paper, and vice versa. It became clear that the problem wasn’t with the printer itself but rather with the paper settings on my PC. I had to find a way to adjust these settings to match the requirements of my print job.
I started by checking the printer’s settings through the Control Panel on my PC. I navigated to “Devices and Printers,” where I found my Brother printer listed. Right-clicking on the printer icon, I selected “Printer Properties,” expecting to find a straightforward option to change paper settings. However, what I encountered was a complex array of settings that seemed overwhelming at first glance. There were tabs and options for paper quality, paper size, and other preferences, but nothing seemed immediately obvious.
Realizing that I needed a more systematic approach, I decided to consult the printer’s user manual. It was a good starting point, but unfortunately, it didn’t cover every detail about changing paper settings from the PC side. It did, however, provide me with some valuable insights into how the printer handles paper sizes and how to access the relevant settings through the printer’s own menu.
Determined to solve the problem, I searched online for specific instructions on adjusting paper settings for Brother printers from a PC. I found various forums and user guides that suggested different methods, but they all seemed to point in similar directions. I decided to follow the most common approach: changing the settings through the printer driver software installed on my PC.
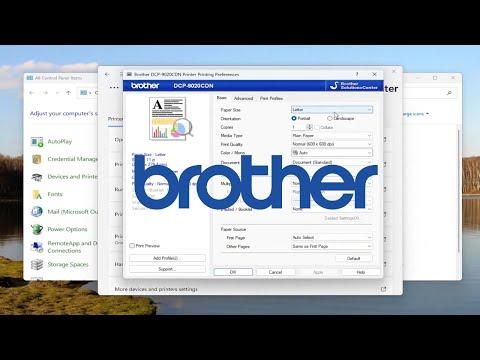
First, I opened the “Devices and Printers” section again and right-clicked on the Brother printer icon. This time, I selected “Printing Preferences” from the dropdown menu. In the Printing Preferences window, I was able to see a list of options related to paper settings. There was a tab specifically labeled “Paper/Quality” where I could adjust the paper size and type.
I selected the “Paper/Quality” tab and was immediately presented with several options. The first step was to choose the correct paper size for the current print job. I selected “Legal” for documents that required legal-sized paper and “Letter” for those that required letter-sized paper. I made sure to apply these settings to the default printer profile to avoid having to adjust them every time I printed.
After adjusting the paper settings, I needed to make sure these changes would be recognized by the printer. I checked the “Advanced” tab in the Printing Preferences window, where I found options related to paper handling and print quality. I verified that the paper size settings were consistent across all tabs to ensure that the printer would correctly process the different paper sizes.
Next, I printed a test page to verify that the settings had taken effect. The test page came out perfectly, with the correct paper size and alignment. This was a promising sign, but I wanted to make sure everything was in order before proceeding with my actual print job. I went ahead and printed a few documents of different sizes to confirm that the paper settings were being applied correctly.
Everything seemed to be working well, but just to be thorough, I rebooted my PC and the printer to ensure that the changes would persist. After rebooting, I printed another test page and several more documents. The results were consistent, and the printer handled the paper sizes as expected.
Reflecting on the experience, I realized that the issue wasn’t just about changing paper settings but also about understanding how different components of the printing process work together. The solution involved a combination of adjusting settings through the printer driver software and ensuring that those settings were applied correctly.
I also learned the importance of consulting user manuals and seeking help from online resources when faced with technical challenges. It was a valuable lesson in troubleshooting and problem-solving, showing me that even seemingly minor issues can require careful attention and persistence.
In the end, I was able to resolve the problem with the Brother printer and successfully complete my print job. The frustration of dealing with incorrect paper settings was replaced with a sense of accomplishment and relief. The experience reinforced my confidence in handling technical issues and provided me with a useful skill for future printing tasks.
