I was excited to dive into the world of email customization and make my Gmail messages stand out. I had just discovered that you could change text colors, which seemed like the perfect way to make my emails more engaging and visually appealing. However, my enthusiasm soon turned into frustration when I couldn’t figure out how to do it. I had always relied on the default Gmail settings, and the idea of changing text colors seemed more complicated than I initially thought. I knew I needed to tackle this issue head-on, so I set out on a quest to master the art of text color modification in Gmail.
My journey began with a simple Google search, but the results were overwhelming and often confusing. The official Gmail help pages were useful but didn’t quite delve into the step-by-step process I was hoping for. I needed a clear, concise guide to walk me through the process. I decided to explore various online forums, video tutorials, and blog posts, hoping to find that one piece of information that would make everything click.
After sifting through countless articles, I finally stumbled upon a useful guide. It turned out that changing text color in Gmail was not as difficult as it initially seemed. The ultimate solution lay in using Gmail’s built-in formatting options. Here’s how I managed to achieve my goal.
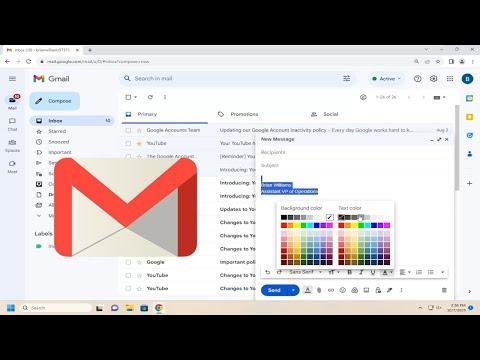
First, I opened Gmail and clicked on the “Compose” button to start a new email. This brought up the email composition window where I could type out my message. To access the text formatting options, I needed to locate the formatting toolbar at the bottom of the composition window. It’s a small, sometimes overlooked section, but it’s crucial for customizing your text.
I noticed that the toolbar had a “A” icon with a color palette next to it. This was the text color button. Clicking on it revealed a color palette with a variety of color options. I was excited to see this because it meant I could choose from a wide range of colors to highlight specific parts of my email. I selected the color I wanted, and it instantly changed the color of the highlighted text in my email. It was that simple!
Next, I explored the option to apply different colors to different parts of my email. I could highlight specific words or phrases and then choose a color from the palette to make those parts stand out. This was perfect for emphasizing important information or making my emails more visually appealing. I was pleased with how straightforward the process was once I found the right tools.
One challenge I encountered was ensuring that the color choices were consistent throughout my email. I wanted to make sure that the colors I chose complemented each other and did not create a cluttered or chaotic appearance. To address this, I made use of the color preview feature to see how different colors looked together before finalizing my choices. This helped me create a more polished and cohesive look for my emails.
Another tip I found useful was to use a limited color palette to maintain a professional appearance. Although it was tempting to use a wide range of colors, I realized that sticking to a few complementary colors made my emails look more organized and visually appealing. It also ensured that the focus remained on the content of my message rather than the formatting.
As I became more comfortable with changing text colors, I also explored how different colors could convey different tones or emotions. For instance, using blue for important information created a sense of calm and trustworthiness, while red highlighted urgent or critical points effectively. Understanding the impact of color on communication helped me use this feature more effectively in my emails.
In addition to text color, I also discovered other formatting options that enhanced my email presentations. For instance, I could adjust font styles, sizes, and even add highlights to make specific parts of my email stand out. Experimenting with these features allowed me to create emails that were not only colorful but also visually engaging and professional.
I also learned that Gmail’s formatting options might not be as advanced as some other email clients, but they were sufficient for most of my needs. For more complex formatting requirements, I might need to consider using email clients with more robust formatting tools. However, for everyday email communication, Gmail’s built-in options were more than adequate.
Ultimately, mastering the art of changing text colors in Gmail turned out to be a rewarding experience. It allowed me to personalize my emails and make them more engaging for the recipients. The key was to start with a basic understanding of the formatting toolbar and then explore the various options available. By focusing on simplicity and consistency, I was able to enhance my email communications effectively.
In conclusion, the process of changing text color in Gmail was a journey that began with confusion but ended with a satisfying solution. By delving into the formatting options and experimenting with different colors, I was able to achieve the ultimate goal of making my emails more visually appealing. If you ever find yourself facing a similar challenge, remember that the solution is often simpler than it seems, and with a little exploration, you can enhance your email experience significantly.
