When I first upgraded to Windows 11, I was thrilled by the sleek new interface and the improved performance. However, I quickly realized that something I had taken for granted in previous versions of Windows needed to be addressed: changing my default web browser. I was accustomed to using Google Chrome for years, but with the upgrade, Windows 11 defaulted to Microsoft Edge, and I needed to switch it back to my preferred browser. It wasn’t immediately obvious how to make this change, so I had to dig into the settings and figure out the process.
Initially, I tried to find a straightforward way to set Chrome as my default browser by searching online. The instructions I came across were varied and sometimes outdated, which made me feel a bit overwhelmed. Some sources suggested going through the Settings app, but they didn’t always match up with the interface I was seeing. Others recommended adjusting settings from within Chrome itself. I decided to take a step-by-step approach to solve this issue.
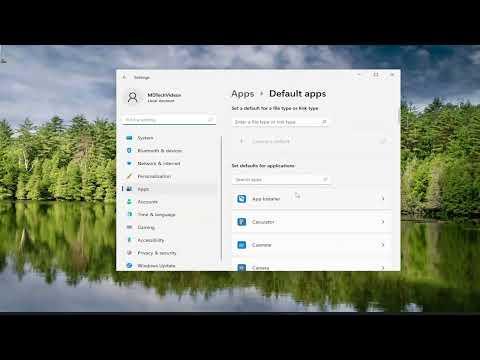
First, I accessed the Windows 11 settings by clicking on the Start menu and then selecting the gear icon to open the Settings app. Once I was in the Settings window, I navigated to the “Apps” section. Here, I found an option labeled “Default apps,” which seemed like the right place to make changes to default program settings.
In the Default apps section, I was greeted by a list of different types of file types and protocols, such as .html files, .pdf files, and protocols like HTTP and HTTPS. What I noticed immediately was that each of these items had an assigned default application, which was set to Microsoft Edge by default. This realization made it clear that changing the default browser was going to involve adjusting several of these settings.
I started by clicking on the entry for “Web browser,” which was currently set to Microsoft Edge. A list of installed browsers appeared, including Google Chrome. I clicked on Google Chrome, expecting this to be enough to set it as my default browser. However, as I explored further, I discovered that this method only changed the default for the basic web browsing tasks.
To make sure Chrome was set as the default for all relevant protocols and file types, I went back to the Default apps section and carefully adjusted each relevant entry. For instance, I needed to change the default application for HTTP, HTTPS, and .html files to Google Chrome. Each time I clicked on one of these entries, a list of installed browsers appeared, and I selected Google Chrome each time.
One detail that initially confused me was the distinction between file types and protocols. It became clear that while setting Chrome as the default browser handled some cases, I also needed to ensure that it was associated with every possible file type and protocol related to web browsing. This meticulous approach helped me avoid any issues where a particular type of web link or file might still open in Edge.
After making these adjustments, I tested a few different types of web links and files to ensure that they now opened in Google Chrome by default. I clicked on a few hyperlinks in different applications and checked various web-related file types, such as HTML documents, to confirm that they all opened in Chrome as intended. This testing process gave me confidence that the changes I made were successful.
In conclusion, changing the default browser in Windows 11 was a bit more involved than I initially expected, but it was manageable with a systematic approach. By accessing the Default apps section in the Settings app and adjusting each relevant file type and protocol, I was able to ensure that Google Chrome became my default browser across all web-related activities. This process not only restored my preferred browsing environment but also made me more familiar with the settings and customization options available in Windows 11.
