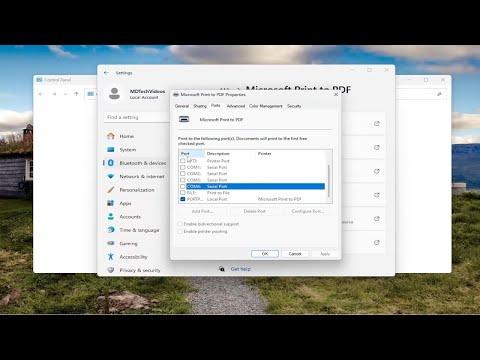
When I needed to check and change the printer port on my Windows 11/10 computer, I quickly realized that the process wasn’t as intuitive as it could be. Initially, it seemed like a daunting task, but once I understood the steps involved, it turned out to be quite manageable. Here’s a detailed guide on how I navigated this process.First, I started by opening the Control Panel. To do this, I clicked on the Start button and typed “Control Panel” into the search bar. This brought up the Control Panel application, which I clicked to open. From there, I navigated to the “Devices and Printers” section. This section provides a list of all the printers and devices currently connected to my computer.In the “Devices and Printers” window, I located the printer whose port I wanted to check or change. Right-clicking on the printer’s icon, I selected “Printer properties” from the context menu. This action opened a new window with several tabs, each representing different settings related to the printer.I then clicked on the “Ports” tab. This tab is crucial because it displays all the available ports and shows which port the selected printer is currently using. In this section, I saw a list of different ports such as USB, LPT, and TCP/IP, along with checkboxes indicating which port each printer is using.To verify or change the port, I first needed to identify the correct port for my printer. If I was troubleshooting an issue, I would ensure that the port my printer was using was correct and matched the type of connection the printer required. For instance, if my printer was connected via USB, I needed to make sure the USB port was selected.If I found that the port was incorrect or if I needed to change it for any reason, I proceeded with the following steps. I selected the port I wanted to change to from the list. If the port I needed was not listed, I would click on “Add Port” to create a new one. In the “Add Port” window, I selected the appropriate port type, such as Standard TCP/IP Port for network printers, and followed the prompts to configure the port settings. This included entering the IP address or hostname of the printer if it was a network printer.After configuring the new port, I returned to the “Ports” tab and checked the box next to the newly configured port to assign it to my printer. I then clicked “Apply” to save the changes. If the port change was successful, the printer would now use the new port, and I would see this reflected in the list.In some cases, I might have needed to install a printer driver that was compatible with the new port settings. To ensure everything was set up correctly, I returned to the “General” tab in the “Printer Properties” window and checked if the printer was functioning as expected. Sometimes, a quick test print was all that was needed to confirm that the printer was correctly connected and operational.If there were any issues or if the printer did not appear to be working correctly after changing the port, I reviewed the steps to ensure that the correct port was selected and that all configurations were accurate. Occasionally, restarting the computer or the printer might resolve connectivity issues.Additionally, I made sure that the printer’s firmware was up-to-date. Outdated firmware could sometimes cause connectivity issues, so keeping it updated was part of my troubleshooting process. I visited the manufacturer’s website to check for any available updates and followed their instructions to update the printer’s firmware if necessary.Lastly, I learned that some printers come with their own configuration utilities. These utilities can sometimes provide an easier way to manage printer ports and settings compared to the built-in Windows tools. If my printer had such a utility, I used it to configure and manage the printer settings more efficiently.Overall, checking and changing the printer port in Windows 11/10 required a few straightforward steps, but attention to detail was crucial. By navigating through the Control Panel, adjusting settings in the “Printer Properties” window, and ensuring that the correct port was selected, I was able to resolve any issues related to printer connectivity. With practice, the process became quicker and more intuitive, making printer management on my Windows 11/10 computer much more manageable.
How to Check and Change Printer Port in Windows 11/10 [Guide]
