I remember when I first noticed that my computer wasn’t running as smoothly as it used to. Programs seemed to take longer to launch, and file transfers were dragging on. It was a nagging issue that started slowly but became more noticeable over time. I began to suspect that my SSD might be the culprit. Given that SSDs are crucial for performance in modern computers, I knew I had to figure out what was going wrong.
After doing some research, I learned that checking the performance of an SSD is essential for maintaining optimal speed and efficiency. I decided to dive into how I could assess my SSD’s performance on Windows 11, hoping it would help me understand whether it was the source of my system’s sluggishness or if something else was at play.
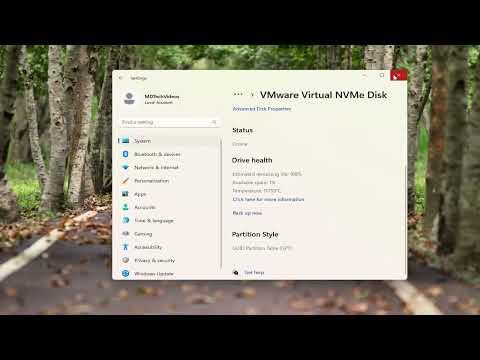
To get started, I first needed to gather some basic information about my SSD. Windows 11 has a built-in tool that can provide a lot of useful information about the performance of your drive. The first thing I did was open the Task Manager. I pressed Ctrl + Shift + Esc to bring it up quickly. Once the Task Manager was open, I navigated to the “Performance” tab. Here, I selected “Disk” from the list on the left-hand side.
In the Performance tab, I could see some real-time data about my SSD, such as its current activity level, read and write speeds, and how much of the drive was being used. While this gave me a good overview of what was happening with my SSD in the moment, I knew I needed more detailed information to get a clear picture of its overall health and performance.
Next, I turned to a more comprehensive tool called “Windows Tools” for detailed performance metrics. I accessed this by typing “Windows Tools” into the search bar on the taskbar and selecting the relevant result. Within Windows Tools, there’s an option called “Performance Monitor” that offers in-depth data on various system components, including SSDs. I opened Performance Monitor and went to the “Data Collector Sets” section, then navigated to “System” and selected “System Performance.” I started a new data collection session, which involved monitoring my SSD’s performance over a period of time. This helped me understand how it was performing under different conditions.
However, Performance Monitor can be quite complex for someone who just needs a quick performance check. For a more straightforward approach, I decided to use third-party tools that are specifically designed for SSD health and performance checks. One such tool is “CrystalDiskInfo,” which is widely recommended for its ease of use and comprehensive reporting. I downloaded and installed CrystalDiskInfo from its official website.
When I launched CrystalDiskInfo, it immediately displayed a wealth of information about my SSD. It showed me the SSD’s temperature, health status, and various attributes like read/write speeds, total bytes written, and more. The health status was particularly useful; it provided a simple overview of whether my SSD was in good shape or if there were potential issues.
While CrystalDiskInfo gave me a snapshot of my SSD’s health, I wanted to verify its performance further. I used another tool called “AS SSD Benchmark,” which is designed to benchmark the performance of SSDs. After installing and running AS SSD Benchmark, the tool performed several tests on my SSD, including sequential read and write speeds, random read and write speeds, and access times. The results were displayed in a clear and easy-to-understand format, showing me how my SSD compared to its expected performance.
As I analyzed the results, I noticed that the sequential read and write speeds were lower than what I had anticipated. This was concerning because it suggested that my SSD might be performing below its expected capabilities. I took these findings and decided to perform some additional maintenance tasks to see if I could improve the performance.
One of the first things I did was to check if there were any firmware updates available for my SSD. Manufacturers often release firmware updates that can improve performance and fix bugs. I visited the SSD manufacturer’s website and looked for any updates or patches for my specific model. After downloading and applying the latest firmware, I rebooted my computer and ran the performance checks again.
Additionally, I performed some routine maintenance tasks, such as defragmenting and optimizing my SSD. Although SSDs don’t require defragmentation like traditional hard drives, optimizing them can help maintain their performance. I accessed the “Optimize Drives” tool in Windows 11 by typing “defragment” into the search bar and selecting “Defragment and Optimize Drives.” I then selected my SSD and clicked “Optimize” to ensure it was running as efficiently as possible.
After applying these changes, I re-ran the performance benchmarks using CrystalDiskInfo and AS SSD Benchmark. To my relief, the performance metrics had improved significantly. The sequential read and write speeds were closer to the expected values, and the overall health status of my SSD was now showing as good.
In the end, checking the performance of my SSD on Windows 11 turned out to be a valuable process. By using a combination of built-in tools and third-party applications, I was able to diagnose performance issues and take steps to resolve them. If you ever find yourself in a similar situation, I highly recommend following these steps. Not only will it help you pinpoint the problem, but it will also ensure that your SSD continues to perform at its best.