I remember the first time I needed to check which graphics card I had on my Windows 11 system. I had just purchased a new game that promised stunning visuals and exceptional performance, but I wasn’t sure if my current setup could handle it. My excitement quickly turned to confusion when I realized I didn’t even know which graphics card was installed in my PC. After some initial frustration, I decided to tackle the problem head-on.
I began by diving into the system settings. I figured this was a good place to start since it often holds a lot of information about the hardware components of a computer. I navigated to the Start Menu, clicked on the gear icon to open the Settings app, and then went to the “System” section. From there, I found “Display” on the sidebar, which led me to various display-related settings.
Next, I clicked on “Advanced display settings” at the bottom of the page. Here, I saw a button labeled “Display adapter properties for Display 1”. Curiosity piqued, I clicked on this button, which opened a new window with the title “Display Adapter Properties for Display 1.” This window showed a variety of details, but the most crucial information was the name of the graphics card under the “Adapter” tab.
Seeing the name of my graphics card was a relief; it meant I could now look up its specifications and determine whether it would be able to run my new game. But I was still curious if there was a more comprehensive way to check my graphics card and its performance. I remembered that Device Manager might hold additional details.
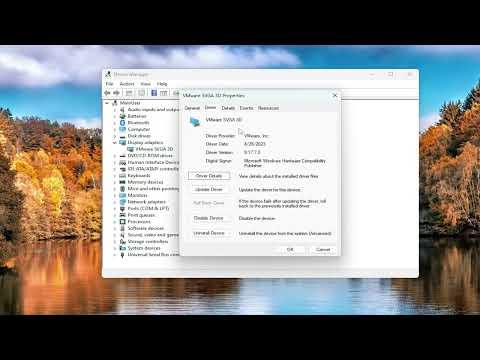
I returned to the Start Menu and typed “Device Manager” into the search bar. The search results displayed the Device Manager app, which I opened. In Device Manager, I expanded the “Display adapters” section, and there it was – a list of all the graphics cards installed in my system. This was reassuring because I could see if my system had multiple graphics cards or if there were any issues.
Another method I discovered to check my graphics card involved using the DirectX Diagnostic Tool. This tool provides detailed information about the graphics card and other system components. To use this tool, I pressed the Windows key + R to open the Run dialog box. I typed “dxdiag” and hit Enter. This launched the DirectX Diagnostic Tool, which took a moment to gather information about my system.
Once the tool was open, I navigated to the “Display” tab. Here, I found a comprehensive overview of my graphics card, including its name, manufacturer, and the amount of video memory. This was particularly useful because it provided detailed insights into the performance capabilities of my graphics card, such as the supported DirectX version and driver details.
Having gathered all this information, I felt confident about my system’s ability to handle the new game. I also realized that checking the graphics card could be important for other purposes, such as troubleshooting display issues or planning future upgrades.
In addition to these methods, I also learned that there are third-party tools available that can provide detailed information about the graphics card and other hardware components. Programs like GPU-Z and HWInfo offer in-depth insights and monitoring capabilities, which can be helpful if you want more granular data about your system’s performance.
I decided to try GPU-Z to see if it offered anything beyond what I had already discovered. I downloaded and installed the program, and upon launching it, I was greeted with a user-friendly interface that displayed a wealth of information about my graphics card, including its name, core clock speeds, memory size, and even temperature readings. This tool was excellent for anyone who wanted a more technical view of their graphics card’s performance and capabilities.
By now, I had a comprehensive understanding of how to check my graphics card on Windows 11. It was a mix of built-in tools and third-party applications that provided different levels of detail, and I found that each method had its strengths. Whether you’re a gamer looking to upgrade your system, a professional needing to ensure compatibility with specific software, or simply someone curious about your hardware, these methods are invaluable.
In the end, I felt much more informed about my PC’s capabilities and was able to enjoy my new game without any concerns about performance. It’s amazing how a bit of exploration and utilizing the right tools can simplify what initially seemed like a daunting task.
