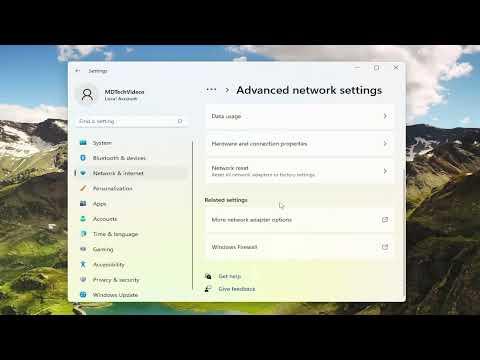
When I needed to check the security type of my Wi-Fi network on Windows 11, I initially felt a bit overwhelmed by the array of settings and options available. However, I soon realized that the process is quite straightforward once you know where to look. In this guide, I’ll walk you through the steps I followed to find out the security type of my Wi-Fi network on both Windows 11 and Windows 10.First, I started by ensuring that my computer was connected to the Wi-Fi network I wanted to investigate. Without an active connection, there would be no information available about the network’s security type. Once I confirmed that my computer was connected to the correct network, I moved on to accessing the network settings.In Windows 11, I clicked on the network icon located on the right side of the taskbar, which is where the Wi-Fi symbol resides. This action opened a quick access menu displaying the list of available networks. I selected the network I was currently connected to, which brought up a menu with various options. I chose “Properties” from this menu to view detailed information about the network. This option led me to the network’s properties page.On the network properties page, I looked for a section that provided details about the security type. I found this information under the “Properties” heading. Here, the security type was listed alongside other details such as the network name (SSID) and the signal strength. For my network, it was displayed as WPA2-Personal, which indicated that my network was using WPA2 encryption with a personal key.If I had been using Windows 10 instead, the process was quite similar, though the navigation differed slightly. I started by clicking on the Wi-Fi icon in the system tray, which is located in the lower right corner of the screen. This brought up a list of available Wi-Fi networks. I selected the network I was connected to, and a new window opened with the network’s details. From there, I clicked on the “Properties” button, which took me to a page where I could view detailed information about the network.On the properties page in Windows 10, I scrolled down until I found the section labeled “Security Type.” This section displayed the type of security protocol my network was using. In my case, it was WPA2-Personal, confirming the encryption method I had seen earlier in Windows 11. I found this to be a quick and efficient way to verify the security settings of my network.For those who might prefer using the Command Prompt, this method is also quite effective. I opened the Command Prompt by typing “cmd” in the Windows search bar and selecting the Command Prompt application from the search results. Once the Command Prompt was open, I typed the command netsh wlan show profiles and pressed Enter. This command listed all the Wi-Fi profiles saved on my computer.Next, I needed to identify the profile of the network I was currently connected to. I could do this by typing netsh wlan show profile name=”NETWORK_NAME” key=clear into the Command Prompt, replacing “NETWORK_NAME” with the actual name of my network. After pressing Enter, the Command Prompt displayed detailed information about the network profile. I looked for the section labeled “Security settings,” where I found the security type listed. For my network, it was WPA2-Personal, which matched the information I had previously obtained through the graphical interface.Another method to check the security type involved using the Settings app in Windows 11. I navigated to Settings by clicking on the Start menu and selecting the gear icon or by pressing the Windows key + I. Once in the Settings app, I went to the “Network & internet” section and selected “Wi-Fi” from the left-hand menu. Here, I clicked on “Hardware properties,” which provided a detailed overview of the network settings, including the security type.In Windows 10, accessing the Settings app was similar. I opened Settings by clicking on the Start menu and selecting the gear icon. I then went to “Network & Internet,” and under the “Status” tab, I selected “View your network properties.” This option provided a summary of the network details, including the security type.Throughout these steps, I discovered that both Windows 11 and Windows 10 offer straightforward methods to check the security type of a Wi-Fi network. Whether using the graphical interface or the Command Prompt, the key is to navigate to the appropriate settings or use the correct commands to obtain the necessary information. By following these steps, I was able to verify the security type of my Wi-Fi network and ensure that it was using a secure encryption method. This knowledge is crucial for maintaining the security and integrity of my network, especially in an era where cybersecurity threats are ever-present.
How to Check WI-FI Network Security Type in Windows 11/10
