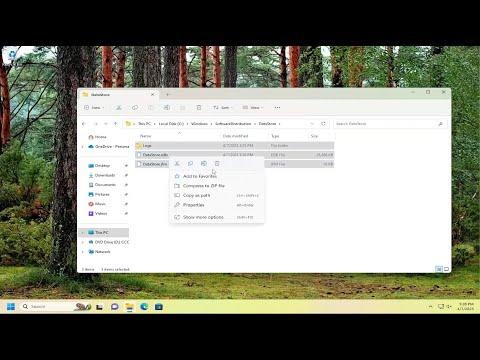
I recently found myself in need of clearing my Windows Update history on Windows 11. The update history can accumulate over time, and while it’s generally useful for tracking updates and troubleshooting, sometimes you might want to clear it for privacy reasons or to resolve issues with the update process itself. I decided to tackle this task and figured out the steps needed to do it. Here’s a detailed tutorial on how to clear Windows Update history in Windows 11 based on my experience.
First off, let me explain why you might want to clear your update history. Windows Update history logs details about updates that have been installed on your system, including successful installations, failed updates, and other related information. While this can be handy for diagnostics, it can also become cluttered or outdated. In some cases, if updates aren’t installing properly or if there’s a specific issue with Windows Update, clearing the history might help in resolving these problems by resetting the log.
The process to clear the update history involves stopping the Windows Update service, deleting the update history files, and then restarting the service. This is a straightforward process but requires a bit of navigation through system settings and services. Here’s how I went about it:
1. **Stopping the Windows Update Service**:
The first step is to stop the Windows Update service to ensure that no update operations are running while you clear the history. To do this, I opened the Run dialog by pressing `Win + R` on my keyboard. In the Run dialog, I typed `services.msc` and pressed Enter. This opened the Services window.
In the Services window, I scrolled down and located the “Windows Update” service. I right-clicked on it and selected “Stop” from the context menu. This action stops the Windows Update service and prevents it from interfering with the process of clearing the history.
2. **Deleting Update History Files**:
With the Windows Update service stopped, I needed to delete the files that store the update history. These files are located in the SoftwareDistribution folder. I navigated to the folder by opening File Explorer and going to `C:\Windows\SoftwareDistribution\`.
Inside the SoftwareDistribution folder, I found and selected all the files and subfolders. I then right-clicked on them and chose “Delete” from the context menu. This removed the update history files from my system. It’s worth noting that deleting these files will not harm your system; it merely removes the records of previous updates.
3. **Restarting the Windows Update Service**:
After deleting the update history files, I needed to restart the Windows Update service to resume normal operations. I went back to the Services window where I had previously stopped the service. I right-clicked on the “Windows Update” service again and selected “Start” to restart it.
Once the service was restarted, Windows would begin creating new update history entries as new updates are installed. This ensures that the update system remains functional and capable of keeping track of future updates.
4. **Confirming the Update History Was Cleared**:
To confirm that the update history had been successfully cleared, I went to the Settings app by pressing `Win + I`. I navigated to `Update & Security` and then to `Windows Update`. Under the update history section, I found that the list of installed updates was now empty or reset, indicating that the history had been cleared.
5. **Additional Steps for Troubleshooting**:
If, after clearing the update history, I faced issues with Windows Update not functioning properly, I would consider running the Windows Update Troubleshooter. This can be accessed from the Settings app under `Update & Security > Troubleshoot > Other troubleshooters`, and then running the Windows Update troubleshooter. This tool helps diagnose and fix common issues with Windows Update.
6. **Rebooting the System**:
After completing the above steps, I opted to reboot my system to ensure that all changes took effect properly. Rebooting helps in refreshing system processes and applying any updates or configuration changes that may have occurred during the process.
In summary, clearing the Windows Update history in Windows 11 involves stopping the Windows Update service, deleting update history files from the SoftwareDistribution folder, and then restarting the service. This process can help in managing clutter and resolving issues related to updates. Following these steps, I was able to successfully clear my update history and keep my system running smoothly.
