I remember the day I first encountered the need to configure my Windows 11 privacy settings like it was yesterday. I had just upgraded from Windows 10, eager to experience the new features and improvements of the latest operating system. Everything seemed fresh and exciting, but as I started to dive into my new system, I realized that my privacy settings were not configured to my liking. This became particularly apparent when I noticed a slight lag in my system performance and received a flood of notifications from various apps and services I had no recollection of approving.
My initial reaction was a mix of frustration and confusion. I wasn’t entirely sure what was causing these issues, so I decided to investigate further. I quickly learned that Windows 11, much like its predecessors, comes with a set of default privacy settings that are designed to enhance user experience but might not necessarily align with individual preferences. It became clear to me that I needed to take control of these settings to ensure my data was not being shared without my consent and to optimize the performance of my system.
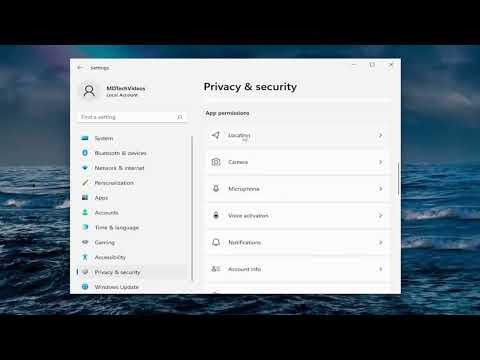
The first step I took was to access the Privacy Settings menu, which can be found by clicking on the Start button and then selecting “Settings.” From there, I navigated to the “Privacy & Security” section. This is where I realized just how extensive the privacy settings in Windows 11 are, and I knew I needed to carefully review each option to make the necessary adjustments.
The first area I focused on was “General.” In this section, I found settings related to letting apps use advertising ID, which allows apps to provide personalized ads. Personally, I prefer not to have my browsing habits used for targeted advertising, so I turned off the option to allow apps to use my advertising ID. I also disabled the setting that allows Windows to use my information to improve typing and writing suggestions. This was a minor adjustment, but it made me feel more secure knowing my data was not being used to train these features.
Next, I moved on to the “Speech” settings. I noticed that Windows 11 collects voice data to improve speech recognition. Since I don’t use voice commands frequently, I decided to turn off the option to let Windows collect my voice data. This step was crucial for me, as it meant that my spoken words would not be recorded or analyzed by Microsoft.
The “Activity History” section was another important area to address. Windows 11 can keep track of your activities and send this data to Microsoft to help improve the OS. I chose to disable the option to let Windows collect and send my activity history to Microsoft. I felt more comfortable knowing that my activities were not being logged and shared.
Moving forward, I explored the “App Permissions” section. Here, I could manage which apps have access to various features like my camera, microphone, and location. I carefully reviewed each app and its permissions, disabling access to features that I felt were unnecessary for that app’s functionality. For instance, I turned off camera access for apps that didn’t need it, such as certain games and utilities. This gave me more control over which apps could access my personal information.
Another critical area was “Background Apps.” Windows 11 allows apps to run in the background and potentially use system resources. To improve performance and reduce unnecessary background activity, I decided to disable background activity for apps that I rarely use or that did not need to run in the background. This step helped in optimizing my system’s performance and reducing the number of notifications and updates I received.
In the “Security” section, I found settings related to data protection and device security. I made sure that my firewall and antivirus protection were enabled, which is crucial for safeguarding my system from potential threats. I also reviewed the “Windows Security” settings to ensure that my device was protected against malware and other security risks.
One of the final steps I took was to review the “Sync Your Settings” options. Windows 11 offers the ability to sync your settings across devices, which can be convenient but also means that certain data is shared between devices. I decided to turn off syncing for certain settings that I didn’t want to be shared, such as my passwords and other sensitive information.
After making these adjustments, I took a moment to review everything and ensure that my privacy settings were configured to my satisfaction. The process took some time, but it was well worth the effort. I felt a significant improvement in my system’s performance and a greater sense of control over my personal information.
In conclusion, configuring Windows 11 privacy settings is a crucial step for anyone who values their personal data and wants to optimize their system’s performance. By carefully reviewing and adjusting each setting, I was able to tailor my privacy preferences to better suit my needs. The process might seem daunting at first, but with a bit of time and attention to detail, it’s possible to ensure that your Windows 11 experience is both secure and tailored to your preferences.
