Last week, I found myself in a rather frustrating situation. I had just bought a new wireless printer, excited to set it up and start printing from the comfort of my home office. Little did I know, the process wasn’t going to be as smooth as I had anticipated. My new computer runs on Windows 11, and I hadn’t set up a wireless printer with this operating system before. I assumed it would be a straightforward task, but after several hours of trying different methods and getting increasingly frustrated, I realized that I needed a step-by-step approach to connect my wireless printer to Windows 11.
The first thing I did was unbox the printer and ensure that it was set up correctly. I followed the manufacturer’s instructions to get the printer out of its packaging, removed all the protective materials, and installed the ink cartridges. Next, I powered the printer on and connected it to my Wi-Fi network. The printer’s display guided me through this process, asking for my network name and password. With that done, I turned my attention to my computer.
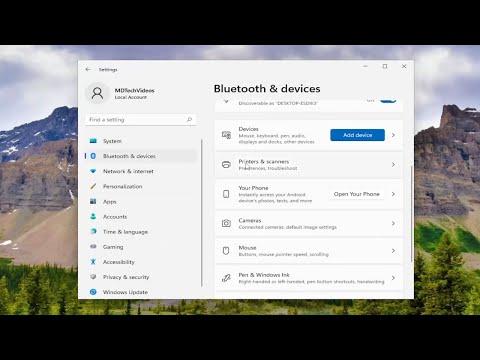
On Windows 11, the process of connecting a wireless printer is designed to be simple, but I quickly discovered that it wasn’t always intuitive. I started by going to the “Settings” menu on my computer. I clicked on the Start menu and selected “Settings” from the list. Once in the Settings menu, I navigated to “Devices” and then to “Printers & Scanners.”
In the Printers & Scanners section, I saw an option that said “Add a printer or scanner.” Naturally, I clicked on it, expecting Windows to automatically detect my new wireless printer. Unfortunately, it didn’t appear in the list of available devices. I was puzzled and frustrated, so I decided to troubleshoot the issue further.
The first step I took was to ensure that both my printer and computer were on the same Wi-Fi network. I checked my printer’s network settings through its onboard menu and confirmed that it was connected to the right network. I also verified that my computer was connected to the same network by checking the Wi-Fi settings on my laptop. Everything seemed to be in order.
Next, I went back to the “Printers & Scanners” section in the Settings menu and clicked on “Add device” once again. This time, I saw a link that said “The printer that I want isn’t listed.” I clicked on it, and a new window appeared with several options. One of the options was to add a printer using a TCP/IP address or hostname. Since my printer was connected to the network wirelessly, I decided to choose this option.
To proceed, I needed to find the IP address of my printer. I referred to the printer’s manual, which guided me on how to print a network configuration page. After printing the page, I found the IP address of my printer. I went back to my computer, entered the IP address in the provided field, and clicked “Next.”
Windows 11 then attempted to connect to the printer using the IP address. After a few moments, the system prompted me to install the printer driver. Fortunately, Windows 11 was able to locate and install the appropriate driver automatically. If it hadn’t, I would have had to download the driver manually from the printer manufacturer’s website. The driver installation process took a few minutes, and once it was complete, I was notified that my printer was ready to use.
To confirm that everything was working correctly, I decided to print a test page. I went back to the “Printers & Scanners” section in the Settings menu, selected my new printer from the list, and clicked on “Manage.” In the management menu, I found the option to print a test page. I clicked it and waited for the printer to produce the test page.
Seeing the test page come out of the printer was a huge relief. It meant that I had successfully connected my wireless printer to my Windows 11 computer. I was finally able to enjoy the convenience of printing wirelessly from my home office. Reflecting on the experience, I realized that while the process wasn’t as straightforward as I had initially hoped, it was manageable with a little patience and perseverance.
Overall, the key steps to connecting a wireless printer to Windows 11 include ensuring both devices are on the same network, using the printer’s IP address if it doesn’t appear automatically, and installing the appropriate driver. Following these steps carefully can help avoid the frustrations I encountered and make the setup process much smoother.
