I was browsing through some online job listings when I realized that I needed a new email address. My old one was cluttered with years of irrelevant subscriptions and outdated correspondence. The situation became more pressing when I found out that several job applications I had sent through my old email hadn’t been received, likely because my inbox had become a black hole for important messages. It was clear that I needed a fresh start, so I decided to create a new Yahoo email account.
Navigating this process turned out to be straightforward once I understood the steps involved. Here’s how I managed to set up my new Yahoo email account, and it might help you too if you’re in a similar situation.
Firstly, I went to Yahoo’s official website. I made sure to type “Yahoo” into my search engine to avoid any look-alike sites, which could be phishing attempts. Once I landed on Yahoo’s homepage, I looked for the “Sign Up” button. It was prominently placed, usually near the top right of the page. I clicked on it, and this action took me to the account creation page.
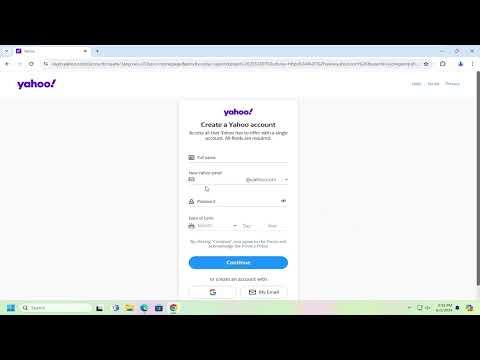
The next step was filling out the registration form. Yahoo required several pieces of information to create my account. I had to provide my name, which would be displayed on the email account, and then choose a unique Yahoo email address. For this, I tried to be creative but also practical; I opted for something simple and professional that I could easily remember.
I then set a strong password. Yahoo recommended using a mix of letters, numbers, and symbols to ensure my account would be secure. I took this advice seriously, knowing that a strong password is crucial for protecting my new email account from unauthorized access. After entering and confirming my password, I proceeded to the next section.
Yahoo also asked for my mobile phone number. This step is essential for account security. It provides a way to verify my identity and recover my account if I ever forget my password. I entered my phone number and received a verification code via SMS, which I then inputted on the Yahoo page to confirm my phone number.
Following this, Yahoo requested a secondary email address. While this isn’t always mandatory, I chose to provide one for added security. This secondary email would act as an additional layer of protection and could be used for account recovery if needed.
With all the necessary information filled out, I reviewed the privacy and terms of service agreements. It was crucial to read through these documents to understand how Yahoo handles my personal information and what my rights and responsibilities are. After accepting these terms, I clicked on the “Continue” button.
Yahoo then directed me to a final verification step, which involved solving a CAPTCHA. This step is designed to confirm that I am a real person and not a bot trying to create multiple accounts. After successfully completing the CAPTCHA, my new Yahoo email account was officially set up.
To ensure everything was working correctly, I logged into my new email account. Yahoo’s interface was user-friendly, and I quickly familiarized myself with the layout. I set up my email signature and adjusted my settings according to my preferences. I also connected my new email to my phone for easier access.
One of the first things I did was to update my contact information on various online accounts and subscriptions. This way, I ensured that any important communications would now come through my new email address rather than getting lost in the old one.
Creating a new Yahoo email account was a relatively easy process, but it did require careful attention to detail to ensure security and functionality. With my new email address up and running, I felt a renewed sense of organization and clarity. The old email was still there, but I now had a fresh start and a more secure and manageable way to handle my communications.
In summary, creating a new Yahoo email account involved navigating to the Yahoo website, filling out the registration form, securing my account with a strong password and phone number, and verifying my identity. The process was simple once I followed the outlined steps, and it provided a much-needed upgrade from my old, cluttered email account.
