I was deep into my work, sifting through lines of code and managing system configurations, when I realized that I needed to frequently run a particular PowerShell script. It was something I did almost every day, and each time I had to navigate through a series of folders, find the script, and then execute it. It was getting tedious and was starting to slow me down. I thought to myself, “There has to be a faster way to do this.”
One evening, as I was working late and my coffee was starting to wear off, I decided to take matters into my own hands. I wanted a shortcut that would allow me to execute my PowerShell script with just a double-click. This wasn’t something I had done before, so I needed to find out how to create a shortcut for PowerShell and make my workflow more efficient.
First, I started by opening PowerShell itself. I did this by searching for “PowerShell” in the Start menu and then selecting “Windows PowerShell” from the list. This was the easy part. But then came the task of finding where my script was located and understanding how to execute it through a shortcut.
I navigated to the folder where my PowerShell script was stored. The script was named MyDailyScript.ps1, and it was buried in a few subdirectories within the Documents folder. The full path to the script was something like C:\Users\MyUsername\Documents\Scripts\MyDailyScript.ps1. I knew that this path would be crucial for creating my shortcut.
Next, I right-clicked on the desktop and selected “New” followed by “Shortcut.” This opened a window asking me to type the location of the item. Here’s where I had to be precise. I wanted to create a shortcut that would not only open PowerShell but also automatically run my script.
To do this, I typed in the following command into the location field:
shellpowershell.exe -ExecutionPolicy Bypass -File "C:\Users\MyUsername\Documents\Scripts\MyDailyScript.ps1"
This command had several components that I needed to understand. The powershell.exe part calls the PowerShell application. The -ExecutionPolicy Bypass flag was used to bypass the execution policy restrictions which sometimes prevent scripts from running. Finally, the -File parameter was followed by the path to my script, ensuring that PowerShell would run this particular script when the shortcut was activated.
After typing the command, I clicked “Next,” which led me to a prompt asking for a name for my shortcut. I named it “Run My Daily Script” to keep things clear and straightforward. Once I hit “Finish,” a new shortcut appeared on my desktop.
Now came the moment of truth. I double-clicked the newly created shortcut to see if it would execute my PowerShell script as intended. To my relief, the script started running immediately, and I saw the output in a PowerShell window that popped up. It worked flawlessly.
However, I noticed that the PowerShell window stayed open even after the script had finished executing. While this wasn’t a huge issue, I decided that I wanted the window to close automatically once the script completed its execution. To achieve this, I had to make a slight modification.
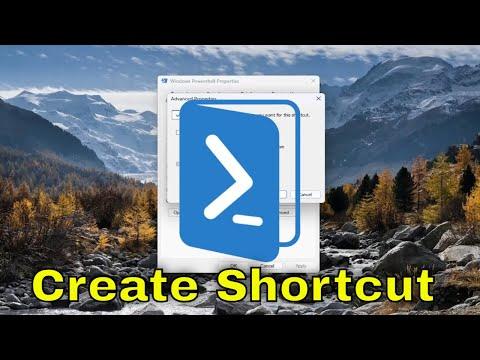
I right-clicked on the shortcut icon and selected “Properties.” In the “Shortcut” tab, I edited the “Target” field to include -NoExit right after powershell.exe. This change ensured that PowerShell would not stay open after executing the script.
The updated command in the “Target” field looked like this:
shellpowershell.exe -ExecutionPolicy Bypass -NoExit -File "C:\Users\MyUsername\Documents\Scripts\MyDailyScript.ps1"
After making this adjustment, I clicked “Apply” and then “OK” to save the