I was in a bit of a bind the other day. I had a big event coming up, and I needed to send out dozens of invitations. The task seemed straightforward enough until I realized that manually writing addresses on each envelope was not only time-consuming but also prone to errors. I had to find a way to streamline the process, and that’s when I stumbled upon the solution: creating labels for envelopes using Microsoft Word.
Initially, I had no idea how to tackle this problem. I knew I could use Microsoft Word for various document tasks, but creating labels for envelopes was something I had never done before. I decided to dive into it and see what I could figure out. After some trial and error, I came up with a step-by-step process that made my life a lot easier. Here’s how I did it, and hopefully, this will help you too if you find yourself in a similar situation.
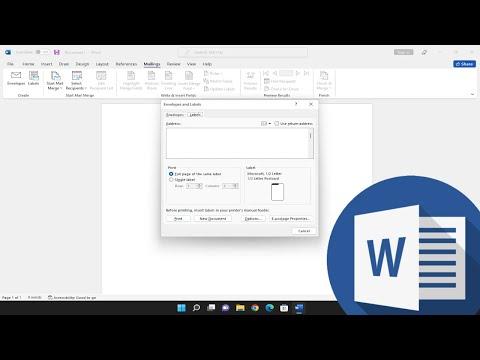
First, I opened Microsoft Word and went straight to the “Mailings” tab. This tab is where all the magic happens for tasks related to mail merge and labels. I clicked on “Labels” to open the “Envelopes and Labels” dialog box. This is where I could start setting up my labels.
In the dialog box, there was an option to select “Options” which brought up a new window. Here, I chose the type of label I wanted. Microsoft Word offers a variety of label formats, so it’s essential to select the one that matches the labels you have. For my project, I used the standard Avery labels, which were readily available. I picked the appropriate product number from the list to ensure that the layout matched my label sheets perfectly.
Once I had selected the correct label type, I clicked “OK” to go back to the main dialog box. I then entered the address details for the label in the “Address” field. Since I had many invitations to send, I wanted to automate the process as much as possible. This meant using a data source to automatically populate the addresses on my labels.
To do this, I clicked on “New Document” which created a new document with the label template. From here, I went back to the “Mailings” tab and selected “Select Recipients” to choose “Use an Existing List.” I then navigated to the Excel spreadsheet I had prepared with all the addresses and selected it. Microsoft Word uses this list to fill in the labels automatically.
I was then able to see all the addresses populated in the label template. It was quite satisfying to see how quickly and efficiently it filled in the details. To ensure that everything looked perfect, I previewed the labels by clicking on “Preview Results” in the “Mailings” tab. This gave me a chance to check for any errors before printing.
When I was satisfied with how everything looked, it was time to print. I clicked on “Finish & Merge” in the “Mailings” tab and selected “Print Documents.” Here, I chose to print all the labels, and I made sure my printer was loaded with the label sheets. I double-checked my printer settings to ensure they matched the label type I was using.
After printing, I was pleased with the results. The labels were perfectly aligned, and the addresses were clear and professional. This process saved me a significant amount of time and effort compared to manually writing each address.
Overall, creating labels for envelopes in Microsoft Word turned out to be an efficient and effective solution to my problem. It was a bit of a learning curve initially, but the ultimate outcome was worth it. If you find yourself needing to tackle a similar task, I highly recommend following these steps. It’s a great way to manage a large volume of mail with precision and ease.
