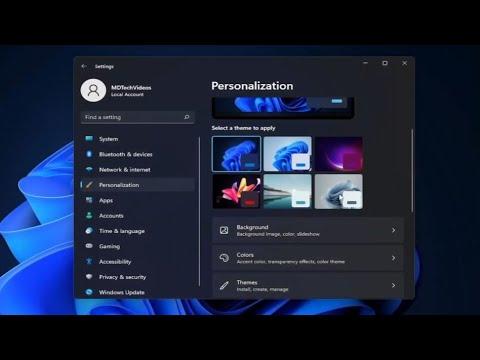
As I sat down at my desk, ready to dive into work, I couldn’t help but notice how dull and uninspiring my Windows 11 desktop looked. It felt like the same old interface every day, and I longed for something more personalized and visually appealing. I decided it was time to explore the possibilities of creating custom themes in Windows 11. Little did I know, this journey would not only transform my workspace but also open up a new world of creativity.
The first thing I did was to familiarize myself with the concept of themes. In Windows 11, a theme is essentially a collection of settings that dictates the appearance of your desktop, including background images, window colors, sounds, and more. Creating a custom theme would allow me to tailor these elements to fit my personal style and preferences.
I started by right-clicking on my desktop and selecting “Personalize” from the context menu. This action took me to the Personalization settings, where I could access a variety of options to customize my desktop experience. The first step in creating a new theme was to choose a background image that resonated with me. I decided to browse through my collection of personal photos, looking for one that would provide a refreshing and motivational backdrop. After selecting a stunning landscape photo, I applied it as my desktop wallpaper.
Next, I focused on adjusting the color settings. Windows 11 offers several color schemes, including Light, Dark, and Custom modes. I opted for a Custom mode, which allowed me to fine-tune both the accent color and the background color of various interface elements. I chose a soothing teal hue for the accent color, which complemented my background image perfectly. This change made the interface feel more cohesive and less monotonous.
With the visual aspects sorted, it was time to tackle the sounds. Windows 11 allows you to change the system sounds, which include notifications, alarms, and other audio cues. I clicked on the “Themes” section within the Personalization settings and then selected “Sounds.” Here, I was presented with a list of events and their associated sounds. I decided to personalize these sounds by choosing a calming chime for notifications and a gentle melody for system alerts. This step added a touch of harmony to my overall desktop experience.
After making these changes, I realized that I wanted to save my customized settings as a new theme so I could easily switch between different looks depending on my mood or task at hand. To do this, I returned to the “Themes” section in the Personalization settings. I clicked on “Save theme” and gave my new creation a name that reflected its essence. This simple act of saving ensured that I could quickly apply my customized settings whenever I wanted, without having to redo all the adjustments.
In addition to these basic elements, Windows 11 allows for further customization through theme packs and third-party tools. I decided to explore theme packs available online to see if there were any that could complement or inspire my own designs. I discovered a few websites that offered a variety of theme packs, ranging from minimalistic designs to vibrant, artistic collections. I downloaded a couple of these packs and installed them to see how they compared to my custom theme.
One of the theme packs I tried featured a sleek, modern aesthetic with sharp contrasts and bold colors. I was impressed by how it transformed the look of my desktop, and it gave me a new appreciation for the versatility of Windows 11 themes. However, I also realized that the best themes are the ones that truly resonate with my personal taste and preferences.
To enhance my theme further, I explored the option of using third-party tools that provide additional customization features. Tools like Rainmeter and WindowBlinds offer advanced options for modifying the appearance of Windows 11 beyond the built-in settings. I decided to experiment with Rainmeter, a popular tool for adding widgets and custom skins to the desktop. By installing Rainmeter and a few of its popular skins, I was able to add useful widgets like weather forecasts, system monitors, and even a clock to my desktop. This not only made my workspace more functional but also added a layer of personalization that was both practical and aesthetically pleasing.
After spending some time experimenting with different themes and tools, I felt that I had created a desktop environment that truly represented my personal style. My workspace now featured a beautiful landscape as the background, a harmonious color scheme, and customized sounds that made using my computer a more enjoyable experience. The addition of Rainmeter widgets further enhanced the functionality and visual appeal of my desktop.
Reflecting on the process, I realized how rewarding it was to transform my desktop into a space that felt uniquely mine. Creating themes in Windows 11 not only allowed me to personalize the appearance of my computer but also provided an opportunity to explore my creative side. Whether I was adjusting colors, choosing sounds, or experimenting with third-party tools, the process was both engaging and fulfilling.
In conclusion, creating themes in Windows 11 is a straightforward yet highly customizable experience. By starting with the basic personalization options and then exploring additional tools and theme packs, I was able to craft a desktop environment that perfectly suited my preferences. If you’re looking to breathe new life into your workspace, I highly recommend diving into the world of Windows 11 themes and discovering the endless possibilities for customization.
