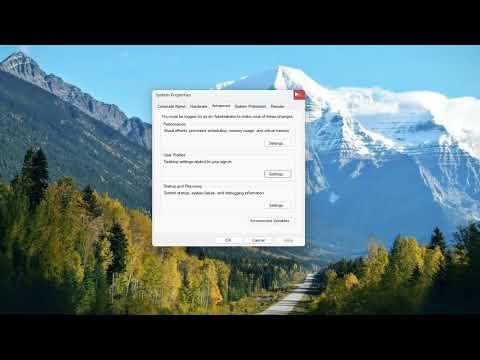
When it comes to managing domain profiles on a Windows computer, particularly when dealing with Windows 10 or Windows 11, the process can sometimes be a bit intricate. I recently faced a situation where I needed to delete a domain profile on my machine. The domain profile was causing some issues with my settings and access permissions, and I realized that removing it could help me start fresh. Here’s how I went about resolving this issue and getting rid of the domain profile.First, I had to understand what a domain profile actually is. A domain profile is a user profile that is associated with a domain network, usually managed by an organization. When you connect a computer to a domain, Windows creates a domain profile for that user. This profile includes all the settings, documents, and configurations that are specific to that user within the domain. If you’re no longer part of the domain or you simply want to remove the profile for any reason, you’ll need to follow a series of steps to do so safely and effectively.The first step in deleting a domain profile is to ensure that you are logged in with an account that has administrative privileges. This is crucial because you need the appropriate permissions to make changes to user profiles on the computer. If you’re logged in with a standard user account, you won’t be able to perform the necessary actions to delete the profile. So, I made sure I logged in as an administrator before proceeding.Once I was logged in with the right account, the next thing I did was to access the System Properties. To get to this, I right-clicked on the Start button and selected “System” from the context menu. In the System window, I clicked on “Advanced system settings” located on the right side. This action opened the System Properties window. In this window, I navigated to the “Advanced” tab and clicked on “Settings” under the “User Profiles” section. This was where I could see a list of all user profiles stored on my computer.In the User Profiles window, I looked for the domain profile that I wanted to delete. The profiles are listed by user name, so I had to find the one associated with the domain. Once I located the correct profile, I selected it and then clicked on “Delete.” A confirmation prompt appeared, asking me if I was sure I wanted to delete the profile. I confirmed my choice, and the profile was removed from the list.After deleting the profile through the User Profiles interface, I took additional steps to ensure that all remnants of the domain profile were completely removed from the system. Sometimes, deleting the profile from the User Profiles window doesn’t clear everything out, so I decided to manually check and clean up any leftover files.To do this, I opened File Explorer and navigated to the C:\Users directory. This folder contains all user profiles on the system. Even though I had deleted the domain profile through the User Profiles window, there might still be a folder corresponding to the deleted profile in this directory. I found the folder associated with the domain profile and deleted it manually. This step helped in making sure that no unnecessary files were left on the system, which could potentially cause issues later on.Additionally, I needed to clean up any residual settings or entries related to the domain profile from the Windows Registry. This is a more advanced step and should be done carefully, as incorrect modifications to the Registry can cause system problems. To do this, I pressed Win + R to open the Run dialog, typed “regedit,” and pressed Enter to open the Registry Editor. In the Registry Editor, I navigated to the following path: HKEY_LOCAL_MACHINE\SOFTWARE\Microsoft\Windows NT\CurrentVersion\ProfileList. Here, I looked for any subkeys associated with the domain profile that I had deleted. After finding them, I deleted these subkeys to ensure that no leftover references to the domain profile were present in the Registry.Finally, to ensure that everything was working smoothly after the deletion of the domain profile, I restarted my computer. Restarting helps to finalize the changes and clear out any temporary files or cached data that might still be associated with the old domain profile. After rebooting, I logged in with my local account to verify that everything was functioning correctly and that the domain profile had been completely removed.In summary, deleting a domain profile from Windows 10 or Windows 11 involves several steps. I started by accessing the System Properties and removing the profile through the User Profiles interface. I then manually deleted any residual files and cleaned up Registry entries related to the domain profile. Finally, I restarted my computer to ensure that the changes took effect. By following these steps, I was able to successfully remove the domain profile and resolve the issues I was experiencing.Could you clarify if you’d like a detailed step-by-step guide on how to delete a domain profile in Windows 11/10, or are you interested in the overall process and considerations involved?
How to Delete Domain Profile in Windows 11/10 [Guide]
