A few weeks ago, I found myself grappling with a frustrating issue on my Windows 11 computer. I had set up a scheduled task using Task Scheduler to automate a backup process for my important files. Everything seemed to be working fine until I realized that I no longer needed the task. I needed to delete it, but I was unsure how to proceed. It felt like a daunting task, especially with my limited experience with the ins and outs of Windows 11.
The first step I took was to search for information online. I came across various tutorials and forums, but they all seemed to complicate what should have been a straightforward process. I was determined to figure it out, so I decided to dive into the Task Scheduler myself. I opened the Task Scheduler by pressing the Windows key, typing “Task Scheduler,” and hitting Enter. The Task Scheduler window appeared, and I was greeted with a list of tasks that I had previously scheduled.
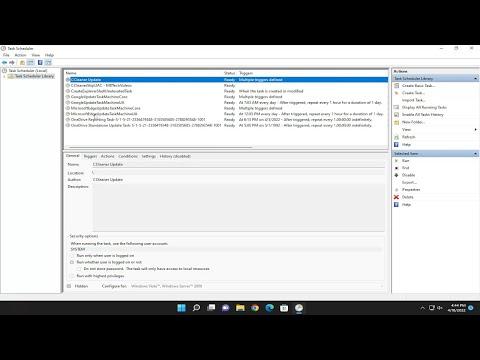
At this point, I had to locate the specific task I wanted to delete. I navigated through the folders on the left-hand side of the Task Scheduler window. There were several folders, each containing different tasks. I expanded the “Task Scheduler Library” folder to view the tasks it contained. I scanned through the list and finally found the task I was looking for. It was named something like “Backup Task,” and I immediately recognized it as the one I had set up earlier.
Before proceeding, I made sure to double-check that this was indeed the correct task. I right-clicked on it and selected “Properties” from the context menu to review its settings. The properties window confirmed that this was the task responsible for my backup process. Satisfied that I had the right one, I returned to the main Task Scheduler window.
The next step was to delete the task. I right-clicked on the task and selected “Delete” from the context menu. A confirmation dialog box popped up, asking if I was sure I wanted to delete the task. I hesitated for a moment, wondering if this action would cause any unintended consequences. But then I reminded myself that this was a task I no longer needed and that deleting it was the right choice.
I clicked “Yes” on the confirmation dialog box, and the task was promptly removed from the list. I felt a sense of relief and accomplishment. The task was gone, and my Task Scheduler window looked much cleaner. I realized that deleting a scheduled task in Windows 11 wasn’t as complicated as I initially thought. The key was to navigate through the Task Scheduler, locate the task, and then use the delete option.
After successfully deleting the task, I took a moment to reflect on the process. I appreciated how Windows 11 streamlined task management, making it relatively easy to handle tasks through the Task Scheduler. The interface was user-friendly, and the steps were straightforward once I got the hang of it. I felt more confident in my ability to manage scheduled tasks moving forward.
Looking back, I realized that my initial uncertainty stemmed from a lack of familiarity with the Task Scheduler. It’s a powerful tool that can be intimidating at first, but with a bit of practice, it becomes much more manageable. I was glad to have tackled the problem myself and learned a valuable skill in the process.
In conclusion, if you ever find yourself needing to delete a scheduled task in Windows 11, don’t be intimidated by the process. Open the Task Scheduler, navigate to the Task Scheduler Library, locate the task you wish to delete, and use the delete option. It’s a straightforward procedure that can be accomplished in just a few steps. With this knowledge, you’ll be able to manage your tasks effectively and keep your system running smoothly.