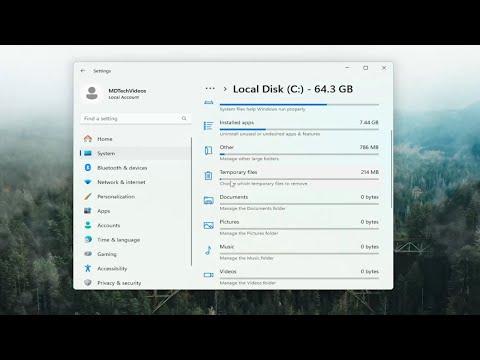
I remember the day I first encountered the issue with System Queued Windows Error Reporting (WER) files. It was a typical day, and I was going through my routine computer maintenance, trying to keep everything running smoothly. As I was clearing out temporary files and performing a disk cleanup, I noticed that my hard drive was still significantly full. Curious, I decided to delve deeper into what might be taking up so much space. That’s when I stumbled upon the WER files, and they seemed to be the culprits.
The WER files, often stored in a hidden system directory, are used by Windows to record errors and crashes. Over time, these files can accumulate, and if not managed properly, they can take up a considerable amount of space on your drive. This was precisely what I was experiencing—my drive was nearly full, and these files seemed to be growing uncontrollably.
My initial reaction was to try and delete these files manually. I navigated to the location where these files are stored, usually found in the C:\ProgramData\Microsoft\Windows\WER directory, and started deleting them. However, I quickly realized that simply removing the files wasn’t a long-term solution. The files would reappear, and my hard drive would once again become cluttered.
I needed a more permanent fix. The ultimate solution, I found, involved a few additional steps beyond just manual deletion. First, I made sure to back up my important data. It’s always a good practice to ensure that you don’t accidentally lose any important files while performing system maintenance. Once I had my backups in place, I proceeded with the following steps:
-
Adjusting Windows Error Reporting Settings: I went into the Control Panel and accessed the Security and Maintenance settings. There, I looked for the Problem Reporting Settings option. I chose to change the setting from “Automatically check for solutions” to “Never check for solutions.” This would prevent Windows from creating new error reporting files for future issues.
-
Clearing Existing WER Files: After adjusting the settings, I needed to manually delete the existing files. To do this, I opened the File Explorer with administrative privileges and navigated to the
C:\ProgramData\Microsoft\Windows\WERdirectory. I selected all the files and folders within this directory and pressed the delete key. Some files might be in use and couldn’t be deleted immediately, but that was okay. -
Using Disk Cleanup: I then used the built-in Disk Cleanup tool. By typing “Disk Cleanup” into the Windows search bar and selecting the tool, I could choose to clean up system files. This utility also helps remove temporary files, including error reporting files, which are sometimes left behind. I ran the cleanup, and it helped clear additional space.
-
Clearing Temporary Files: I also accessed the
C:\Windows\Tempand%temp%directories and deleted any temporary files present there. These are frequently used by Windows for various operations and can accumulate over time. -
Checking for Updates: Finally, I made sure that my Windows system was up-to-date. Sometimes, outdated system files or bugs can contribute to the generation of error reporting files. By installing the latest updates and patches, I reduced the chances of future issues.
With these steps, I was able to reclaim a significant amount of space on my hard drive. It took a bit of time and patience, but the results were worth it. The space was freed up, and I no longer had to worry about the continuous accumulation of WER files.
In conclusion, dealing with System Queued Windows Error Reporting files involves more than just deleting files. It requires adjusting system settings, using built-in tools, and keeping your system updated. By following these steps, I managed to resolve the issue and maintain a cleaner, more efficient computer system.
