I never imagined I’d have to dive deep into the workings of Windows Defender, but sometimes life throws you into unexpected situations. It all began one chilly winter evening. I had just finished setting up my new Windows 11 PC, eager to explore its features and performance. Everything was going smoothly until I encountered an issue that made me question the role of Windows Defender in my system.
One day, my computer started to slow down considerably. It seemed like every application I launched took forever to open, and even basic tasks became a struggle. I suspected that the problem might be related to Windows Defender, the built-in antivirus and security software that came with my Windows 11 operating system. I had heard mixed opinions about its performance and impact on system resources, so I decided it was time to investigate.
After doing some preliminary research, I realized that disabling or enabling Windows Defender could potentially solve my problem. But, of course, I needed to do it correctly. My goal was to either turn off Windows Defender temporarily or adjust its settings to see if it was the culprit behind the slowdown.
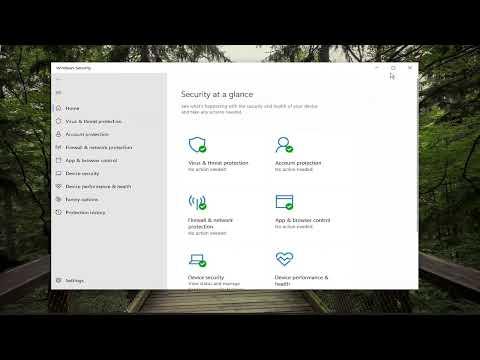
To get started, I first needed to access the Windows Security settings. I navigated to the Start menu and typed “Windows Security” into the search bar. Clicking on the Windows Security app took me to the main dashboard, where I could manage various security settings.
In the Windows Security dashboard, I clicked on “Virus & threat protection.” Here, I found the option to manage settings under “Virus & threat protection settings.” This was where I could adjust the real-time protection settings, which I suspected might be causing the slowdown.
To disable Windows Defender temporarily, I turned off the “Real-time protection” toggle. A pop-up appeared, warning me that turning off real-time protection could make my PC vulnerable. I understood the risks but was willing to take them for a short period to diagnose the issue. After turning off real-time protection, I noticed an immediate improvement in my computer’s performance. Applications launched faster, and the overall responsiveness of the system improved.
However, I knew that turning off real-time protection was not a long-term solution. It was crucial to re-enable it as soon as possible to keep my computer protected from potential threats. I went back to the same settings and toggled the “Real-time protection” option back on. Within moments, Windows Defender was actively monitoring my system again.
Despite the temporary performance boost, I needed to find a more permanent solution to ensure my system ran smoothly while remaining protected. I decided to delve deeper into the settings to explore other options that might help.
One of the features I found particularly useful was the “Add or remove exclusions” option. This allowed me to specify files or folders that Windows Defender should ignore during its scans. By adding certain files or directories that I knew were safe, I hoped to reduce the strain on system resources and improve performance.
To add exclusions, I went to the “Virus & threat protection settings” and clicked on “Add or remove exclusions.” I then clicked on “Add an exclusion” and selected the type of exclusion I wanted to create—whether it was a file, folder, file type, or process. After specifying the items I wanted to exclude, I saved the changes and restarted my computer.
The exclusion process seemed to make a difference. My computer’s performance remained stable, and I no longer experienced the significant slowdowns I had encountered earlier. I continued to monitor the system to ensure that the exclusions did not inadvertently compromise my security.
In addition to adding exclusions, I explored other settings under “Virus & threat protection.” I discovered the “Manage settings” section, where I could configure additional options such as cloud-delivered protection, automatic sample submission, and tamper protection. Adjusting these settings allowed me to strike a balance between performance and security, tailoring Windows Defender to better suit my needs.
Despite these adjustments, I remained vigilant about keeping my system secure. I regularly updated Windows Defender definitions to ensure that it could detect the latest threats. I also used other security tools and best practices, such as running periodic full system scans and avoiding risky online behaviors.
In summary, my experience with Windows Defender on Windows 11 was a journey of trial and error. Disabling and enabling real-time protection temporarily helped me diagnose performance issues, while adjusting settings and adding exclusions provided a more sustainable solution. By understanding and managing Windows Defender’s features, I was able to optimize my computer’s performance without compromising its security.
