I remember the day I stumbled upon the need to manage my PC’s performance better. It was a typical weekend, and I had been trying to streamline my computer’s efficiency for some time. I had heard about various tools and software that could help with this, but nothing seemed quite right until I discovered Microsoft PC Manager. As soon as I learned about it, I realized it could be the solution I needed to optimize my system’s performance on Windows 11. I decided to dive in and figure out how to download and install it.
First, I had to ensure that Microsoft PC Manager was the right tool for me. I read up on its features, which promised to offer a range of optimization tools including system cleanup, performance monitoring, and security enhancements. Given my goal to improve my PC’s performance and keep it running smoothly, it seemed like an ideal fit.
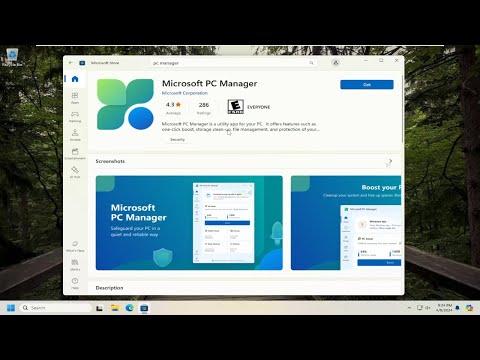
My first step was to locate a reliable source from which to download the software. After a quick search on the internet, I found the official Microsoft website, which seemed like the safest option. Microsoft’s own website is always a good bet for downloading software because it reduces the risk of encountering malicious files or unnecessary bloatware.
Navigating to the Microsoft PC Manager download page, I saw that there was an option to download the latest version compatible with Windows 11 and Windows 10. I clicked the download button, and the file began to download onto my computer. The file was relatively small, so the download didn’t take long.
Once the download was complete, I needed to install the software. I located the downloaded file in my Downloads folder, which was named something like “MicrosoftPCManagerSetup.exe”. Double-clicking on the file opened the installation wizard. The first screen of the wizard asked for permission to make changes to my PC. I clicked “Yes” to proceed.
The installation process began, and the wizard guided me through the necessary steps. I was prompted to agree to the terms and conditions, which I read carefully before accepting. The next step was to choose an installation location. I decided to go with the default option, which was the C: drive, as it’s generally recommended to keep programs in their default directories unless there’s a specific reason to change it.
As the installation progressed, a progress bar showed how much longer it would take. I took this time to review some additional features and settings offered by Microsoft PC Manager on their official website. By the time I returned to my computer screen, the installation was complete. The wizard prompted me to launch Microsoft PC Manager, and I clicked “Finish” to exit the setup.
Upon launching the software for the first time, I was greeted by a user-friendly interface. The initial setup required me to go through a quick configuration process. I had to log in with my Microsoft account to access all features, which was straightforward since I already had an account. Once logged in, I was taken to the main dashboard.
The dashboard offered a clear overview of my system’s performance, including metrics like CPU usage, memory usage, and disk space. One of the first features I explored was the “Cleanup” tool. It promised to free up space by removing unnecessary files, and I was eager to see how much space I could recover. After running the cleanup tool, I was pleasantly surprised to find that it had cleared a significant amount of space on my hard drive.
Another feature that caught my attention was the “Performance Monitor.” This tool provided real-time data on how my PC was performing and alerted me to any potential issues. I found this particularly useful because it allowed me to monitor my system’s health and take action before minor issues turned into major problems.
In addition to performance monitoring, Microsoft PC Manager offered a “Security” feature. It scanned for potential threats and vulnerabilities, helping me ensure that my system was protected from malware and other security risks. The scan results showed that my PC was in good shape, but it also suggested a few minor adjustments to enhance security further.
I also appreciated the “Startup” management feature. This allowed me to review which programs were set to launch at startup and disable any that were unnecessary. This feature was particularly valuable because it helped me reduce boot times and improve overall system performance.
After exploring the various features, I decided to set up automated maintenance tasks. Microsoft PC Manager allowed me to schedule regular cleanups, performance scans, and security checks. This meant that I wouldn’t have to remember to run these tasks manually, and my system would stay optimized with minimal effort on my part.
Overall, my experience with Microsoft PC Manager was very positive. The installation process was smooth and straightforward, and the software’s features were intuitive and effective. My PC felt more responsive, and I noticed a significant improvement in performance. The ability to monitor and optimize my system from a single application was incredibly convenient, and I was pleased with how well it integrated with Windows 11.
In summary, downloading and installing Microsoft PC Manager was a straightforward process. By following the steps to download the software from the official Microsoft website, going through the installation wizard, and exploring its features, I was able to enhance my PC’s performance significantly. The software proved to be a valuable tool in maintaining the efficiency and security of my system.