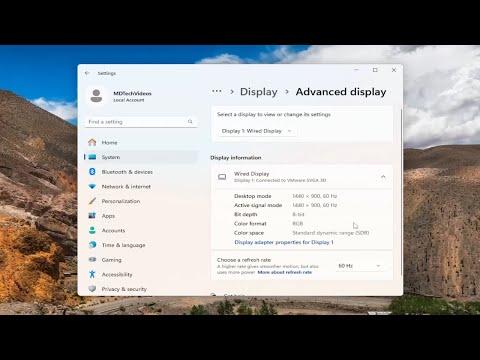
To enable a dynamic refresh rate on Windows 11, I first began by understanding what a dynamic refresh rate is and why it could be beneficial. Dynamic refresh rate allows the monitor to automatically adjust its refresh rate depending on the content being displayed. This means that the display can refresh at a higher rate during high-motion activities, like gaming, and lower it during less intensive tasks, like browsing, which can improve battery life and overall system performance.The first step I took was to check if my monitor and graphics card supported dynamic refresh rates. For this, I verified my hardware specifications and made sure that my monitor had the necessary features. My monitor needed to support a variable refresh rate, and my graphics card had to be compatible with Windows 11’s dynamic refresh rate settings.Next, I made sure that my Windows 11 system was up-to-date. I navigated to Settings, then Update & Security, and selected Windows Update to check for any available updates. Installing the latest updates ensured that I had the most recent drivers and system improvements, which are crucial for enabling dynamic refresh rates.With the system updated, I proceeded to adjust the display settings. I accessed the Settings menu by right-clicking on the desktop and selecting Display settings. Under the Display settings, I found the option for Advanced display settings, where I could see detailed information about my monitor and its capabilities.In the Advanced display settings, I checked if the dynamic refresh rate option was available. I found a drop-down menu under the “Refresh rate” section, which showed various refresh rates that my monitor could support. To enable dynamic refresh rates, I had to ensure that the option to allow Windows to automatically adjust the refresh rate was checked.If this option was not visible or available, I delved into the graphics card settings. For Nvidia users, I accessed the Nvidia Control Panel by right-clicking on the desktop and selecting it from the context menu. Within the Nvidia Control Panel, I navigated to the “Display” section and selected “Change resolution.” Here, I checked if there was an option to enable variable refresh rate or G-SYNC, which is Nvidia’s technology for dynamic refresh rates.For AMD users, I accessed the AMD Radeon Software by right-clicking on the desktop and selecting it from the context menu. In the Radeon Software, I went to the “Display” tab and looked for settings related to FreeSync, which is AMD’s equivalent to G-SYNC. Enabling FreeSync could help in supporting dynamic refresh rates.After configuring the graphics card settings, I went back to the Windows 11 display settings to confirm that dynamic refresh rate was enabled. I tested the settings by running different applications and activities to see if the refresh rate adjusted dynamically. I checked this by using utilities like a frame rate counter or simply observing the performance changes during different tasks.If I encountered any issues or if the dynamic refresh rate was not functioning as expected, I revisited the settings and made sure that all drivers were correctly installed and up-to-date. Sometimes, restarting the computer or reapplying the settings could resolve issues.In summary, enabling a dynamic refresh rate on Windows 11 involved checking hardware compatibility, updating the system, configuring display and graphics card settings, and verifying functionality. By following these steps, I was able to optimize my display for both performance and battery efficiency, making my computing experience smoother and more responsive.
How to Enable a Dynamic Refresh Rate on Windows 11 [Guide]
