In Windows 11, I found myself constantly shifting between multiple open applications, and I was searching for a way to streamline my workflow. One feature that caught my attention was the Snap Layouts, which is designed to help organize open windows on the screen more effectively. I wanted to enhance this feature by enabling the drag-to-top of screen Snap Layouts, which would allow me to drag a window to the top of the screen to access predefined layouts quickly. Here’s how I figured out how to enable this feature and optimize my use of Snap Layouts.
First, I needed to ensure that my system was up-to-date. Windows 11 updates frequently include new features and enhancements, so having the latest version ensures compatibility with all the functionalities. I went to **Settings** by pressing `Win + I`, then navigated to **Update & Security**. Here, I checked for updates and installed any available updates to make sure my system was current.
Once my system was up-to-date, I explored the Snap Layouts feature in Windows 11. Snap Layouts allow users to easily organize their open windows into a grid. To access Snap Layouts, you typically drag a window to the edges or corners of the screen, and it automatically snaps into place. However, dragging a window to the top of the screen does not invoke Snap Layouts by default. I wanted to change this behavior to enhance my workflow.
To enable the drag-to-top of screen Snap Layouts, I started by opening the **Settings** app again and navigating to **System**. In the System menu, I found the **Multitasking** section, which contains settings for Snap Layouts. I clicked on **Snap Layouts** to access the settings related to this feature.
In the Snap Layouts settings, there was an option to customize how windows behave when dragged to the edges of the screen. I made sure that the **Snap Windows** option was enabled. This option allows Windows to automatically arrange open windows into a grid layout when dragged to the edges or corners of the screen.
To enable the drag-to-top feature, I delved into the more advanced settings available within the Snap Layouts menu. I discovered that Windows 11 has specific settings that allow users to adjust the behavior of Snap Layouts. I enabled the option that allows windows to snap to a predefined layout when dragged to the top of the screen. This option was labeled as **Show Snap Layouts when dragging a window to the top of the screen**.
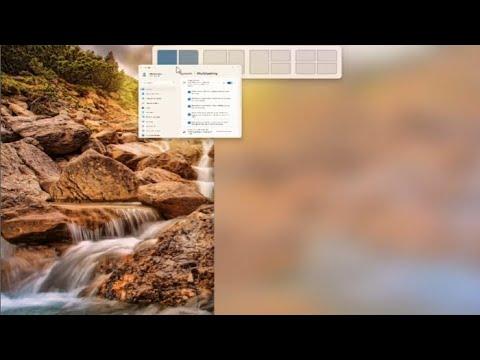
With this option enabled, I tested the new functionality by dragging a window to the top of the screen. As soon as the window reached the top, I noticed that a Snap Layout menu appeared, offering me various layout options. This menu provided a quick way to choose how I wanted to arrange the window relative to other open windows. It significantly improved my workflow, as I could now arrange windows more efficiently without having to manually resize or move them.
One of the ultimate benefits of this feature is the increased productivity it offers. By enabling drag-to-top Snap Layouts, I can now handle multiple applications simultaneously with greater ease. This setup is particularly useful for tasks that require frequent switching between different programs or documents, such as working on a project that involves multiple references or communications.
Additionally, I took some time to explore the various Snap Layout options available. Windows 11 provides several predefined layouts, including side-by-side, top-bottom, and grid arrangements. I customized these layouts to suit my specific needs, adjusting the size of each section to optimize my workspace. This level of customization allows me to tailor the Snap Layouts to fit different tasks, from coding and writing to managing multiple browser tabs and communication tools.
Another feature I explored was the Snap Groups functionality. Snap Groups allow users to save and quickly restore groups of apps that they frequently use together. This feature complements the Snap Layouts by providing a way to organize and access not only the layout of windows but also the specific applications that I use in conjunction. I found this to be incredibly useful for managing complex workflows that involve multiple applications.
To further enhance my productivity, I also explored keyboard shortcuts related to Snap Layouts. Windows 11 provides several keyboard shortcuts that allow users to snap windows to different parts of the screen without using the mouse. For instance, pressing `Win + Left Arrow` or `Win + Right Arrow` snaps a window to the left or right side of the screen, respectively. These shortcuts, combined with the drag-to-top feature, make it even easier to organize my workspace efficiently.
In summary, enabling drag-to-top Snap Layouts in Windows 11 has transformed the way I manage my open windows. By updating my system, customizing Snap Layout settings, and exploring additional features like Snap Groups and keyboard shortcuts, I’ve been able to create a more organized and productive workspace. This feature not only simplifies window management but also enhances my overall efficiency, allowing me to focus more on my tasks and less on manual window adjustments.