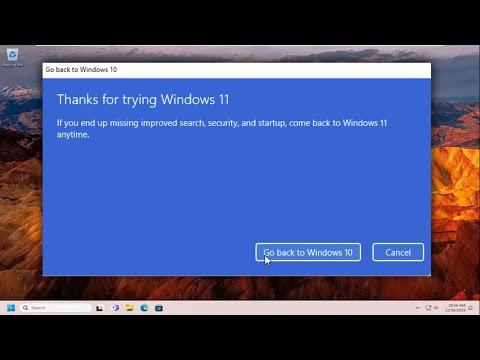
A few weeks ago, I encountered an unexpected issue with my Windows 11 operating system that left me feeling a bit frustrated. After updating to the latest version of Windows 11, I realized that I had made a mistake. I was dealing with a new feature set and interface changes that didn’t suit my workflow as well as the previous version had. Naturally, I wanted to revert back to the previous build to get back to a more familiar environment. However, I ran into a problem I hadn’t anticipated: the option to go back to the previous version was no longer available.
Windows 11, like its predecessors, offers a rollback feature that lets users revert to a previous version of the operating system within a specific time frame. Typically, this feature is available for 10 days after the upgrade. Once this period elapses, the option to revert disappears, leaving users stuck with the current build. I quickly realized that I had missed this window and needed to find a way to enable the “Go Back” button or find an alternative solution to restore my previous setup.
After a bit of research and some trial and error, I discovered a workaround that allowed me to effectively “go back” to my previous version of Windows 11. Here’s how I navigated through the situation and managed to resolve it:
First, I started by accessing the Windows 11 settings. Since the rollback option was no longer visible under “System” > “Recovery,” I had to dig a little deeper. I recalled that some users had managed to solve similar issues by using the Windows Recovery Environment (WinRE) to perform system restores or repairs. So, I decided to give that a try.
I rebooted my computer and accessed the WinRE by holding down the Shift key while selecting “Restart” from the Start menu. This brought me to the advanced startup options. Here, I selected “Troubleshoot” followed by “Advanced options.” This menu provided several choices, including “System Restore,” “Go back to the previous version,” and “Reset this PC.”
Since the direct “Go back” option wasn’t available, I explored the “System Restore” option. I knew that System Restore allows users to revert their system settings to a previous point in time, which could potentially undo changes made by recent updates. I checked the available restore points and was relieved to find a restore point from before I had upgraded to the latest version of Windows 11. I selected this restore point and followed the on-screen instructions to complete the process.
The system restore took a little while to complete, and during this time, my computer rebooted several times. I was slightly anxious about whether this would solve the problem, but once the process was finished, I was greeted with my previous Windows 11 setup. The rollback wasn’t as straightforward as I had hoped, but System Restore effectively returned my system to its previous state.
In case this approach didn’t work, I had also considered other methods. One alternative I thought of was performing a clean installation of the previous version of Windows 11. This would involve downloading the ISO file for the previous version from the Microsoft website, creating a bootable USB drive, and then reinstalling the operating system. While this method would certainly work, it also meant that I would have to reinstall all my applications and restore my files from a backup, which seemed like a last-resort solution.
I also explored the possibility of using third-party software designed to manage system backups and rollbacks. There are various tools available that offer more flexibility and features than the built-in Windows options. However, I decided against this route due to the potential risks and complications involved with third-party solutions, especially when dealing with system-level changes.
Ultimately, the System Restore method was successful, and I was able to return to the previous version of Windows 11 without having to resort to a full reinstall or external tools. The process was a bit more involved than simply using the “Go Back” button, but it provided a satisfactory solution to my problem.
Reflecting on this experience, I realized the importance of acting quickly when dealing with updates and changes to the operating system. The 10-day rollback window is a valuable feature, but once it’s gone, finding alternative solutions can be more complex and time-consuming. It’s always a good idea to create a system backup or restore point before making major changes to your operating system to safeguard against potential issues.
In summary, while the direct “Go Back” button might not always be available, there are still ways to revert to a previous version of Windows 11. Utilizing System Restore or considering a clean installation can provide viable solutions for users facing similar challenges. It’s essential to approach the situation with patience and be prepared for alternative methods if the straightforward options are no longer viable.
