I recently encountered an issue that seemed to be affecting my computer’s performance, particularly when it came to running graphics-intensive applications. After some investigation and troubleshooting, I discovered that enabling Hardware-Accelerated GPU Scheduling might be the key to improving my system’s efficiency. Let me walk you through how I tackled this problem and enabled this feature on my Windows 11 system.
It all began one evening while I was gaming on my computer. I noticed that the frame rates were inconsistent and there was an unusual amount of stuttering. It wasn’t a game issue; I had played this game before without any problems. The performance issues seemed to extend beyond gaming. Even while editing videos or running graphic-heavy software, I could sense that my computer wasn’t performing at its best.
Determined to resolve the problem, I started looking into potential fixes. I came across various suggestions ranging from updating drivers to adjusting system settings. One of the suggestions that stood out was enabling Hardware-Accelerated GPU Scheduling. This feature, introduced in Windows 10 and carried over to Windows 11, promised to reduce latency and improve performance by allowing the GPU to handle scheduling tasks more efficiently.
To enable Hardware-Accelerated GPU Scheduling on my system, I had to follow a few steps. First, I made sure my graphics drivers were up to date. I knew that having the latest drivers is crucial since they often contain optimizations and bug fixes that could address performance issues. I went to the NVIDIA GeForce Experience application, which I use for managing my graphics card drivers, and checked for any updates. There was indeed an update available, so I downloaded and installed it. After rebooting my system, I was ready to proceed with enabling Hardware-Accelerated GPU Scheduling.
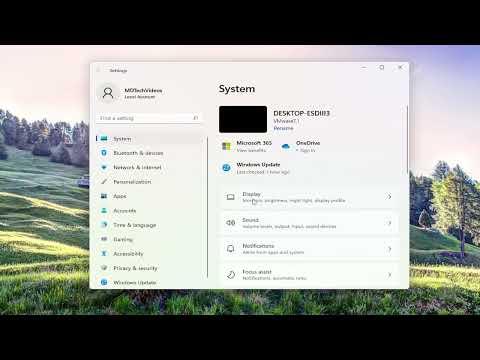
I navigated to the Windows Settings by clicking on the Start Menu and selecting the gear icon, which opened the Settings app. From there, I went to the “System” category. In the System settings, I chose the “Display” option from the sidebar. Scrolling down, I found a link labeled “Graphics settings.” Clicking on this link opened a new page where I could manage GPU settings for different applications.
On this page, I saw a toggle switch for “Hardware-Accelerated GPU Scheduling.” The description under the toggle mentioned that enabling this feature could help improve performance and reduce latency by allowing the GPU to manage its scheduling tasks directly, rather than relying on the CPU. I flipped the switch to enable this feature and then restarted my computer to apply the changes.
After the restart, I noticed immediate improvements. My games ran more smoothly, with fewer stutters and better frame rates. Video editing tasks felt more responsive, and overall, the system seemed more capable of handling multiple graphics-intensive tasks simultaneously. The performance boost was noticeable enough that I knew enabling Hardware-Accelerated GPU Scheduling was a significant step in the right direction.
To further ensure that everything was working correctly, I decided to monitor my system’s performance. I used tools like Task Manager and various performance monitoring applications to check GPU utilization and system responsiveness. It was reassuring to see that the GPU was indeed handling more of the scheduling tasks, allowing the CPU to focus on other processes. The performance metrics indicated that enabling this feature had made a tangible difference.
In addition to improving performance, I realized that enabling Hardware-Accelerated GPU Scheduling could also benefit other aspects of my computing experience. For instance, tasks that involve rendering graphics or processing visual data became less taxing on my CPU, leading to a more balanced and efficient system overall. This also meant that I could work on demanding projects or enjoy gaming sessions without worrying about performance bottlenecks.
Looking back, I’m glad I took the time to investigate and implement this change. The process was straightforward, and the benefits were immediately noticeable. If you’re experiencing similar performance issues on your Windows 10 or Windows 11 system, I highly recommend considering enabling Hardware-Accelerated GPU Scheduling. It’s a simple adjustment that can lead to a more responsive and efficient computing experience, particularly if you frequently run graphics-intensive applications.
Overall, this experience taught me the value of staying proactive with system settings and updates. Sometimes, the solutions to performance issues can be simpler than they initially appear. By taking the time to enable features like Hardware-Accelerated GPU Scheduling, I was able to significantly enhance my computer’s performance and overall usability.