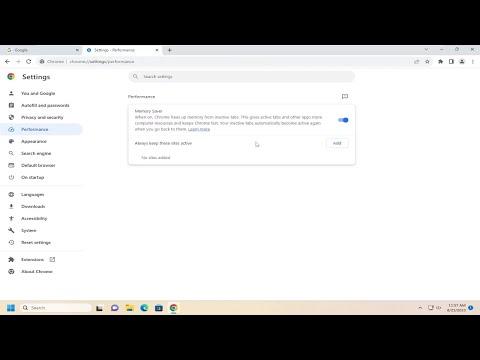
It all started one quiet afternoon when I was working on a project with numerous tabs open in Google Chrome. My computer, usually reliable, began to slow down significantly. Frustration grew as the lag became almost unbearable, especially when I was in the middle of a crucial task. I knew something had to be done to alleviate the performance issues, and that’s when I stumbled upon the memory saver feature in Google Chrome.
I first learned about the Memory Saver option while browsing through a tech forum where users were discussing ways to optimize browser performance. The concept intrigued me, so I decided to dig deeper. From what I gathered, the Memory Saver feature in Google Chrome helps to reduce the memory usage by freeing up memory from tabs that are not currently in use. This sounded like exactly what I needed.
To enable Memory Saver in Google Chrome, I had to follow a series of steps. Here’s how I did it:
-
Open Google Chrome: Naturally, I started by launching my Google Chrome browser. This is where all the magic happens.
-
Access Chrome Settings: The next step was to navigate to the settings menu. I clicked on the three vertical dots in the upper right corner of the browser window, which opened up a drop-down menu. From there, I selected “Settings.”
-
Find System Settings: In the settings menu, I scrolled down until I found the “System” section. I clicked on it to expand more options.
-
Locate Memory Saver Option: Under the System section, there was an option labeled “Memory Saver.” I clicked on it to reveal the toggle switch that enables or disables this feature.
-
Turn On Memory Saver: I flipped the toggle switch to enable the Memory Saver feature. As soon as I did this, I noticed a brief moment of adjustment as Chrome started optimizing my memory usage.
-
Check Performance: After enabling the feature, I continued using Chrome as usual. To my relief, the performance improved noticeably. The browser was more responsive, and the lag I had previously experienced seemed to be a thing of the past.
One additional step I took was to monitor the memory usage to ensure that the Memory Saver was working as intended. I opened the Task Manager in Chrome by pressing Shift + Esc. This tool allowed me to see which tabs and extensions were consuming the most memory. I found that after enabling Memory Saver, the memory usage from inactive tabs was significantly reduced.
Overall, the process of enabling Memory Saver in Google Chrome was straightforward and effective. It provided a noticeable improvement in my browser’s performance, which was especially important given the nature of my work. By freeing up memory from unused tabs, Chrome was able to allocate resources more efficiently, resulting in a smoother browsing experience.
If you ever find yourself facing similar performance issues with Google Chrome, I highly recommend giving the Memory Saver feature a try. It’s a simple yet powerful tool that can make a significant difference in how your browser operates.
