I remember the first time I had to enable Network Level Authentication (NLA) on my Windows 10 machine. It was a daunting experience because I wasn’t familiar with the specifics of NLA or how it could be configured properly. I had recently taken over a new role in the IT department at my company, and one of my primary responsibilities was to ensure that our remote desktop services were as secure as possible. As part of this, I needed to enable NLA on a few machines to meet our security compliance requirements.
The issue first came to light when our security audit team raised concerns about the lack of NLA on some of our remote desktops. NLA is an authentication method used in Remote Desktop Services that requires users to authenticate themselves before establishing a remote desktop session. This adds an extra layer of security by ensuring that the authentication happens before a full Remote Desktop session is established. In short, it’s a vital feature to secure remote connections and prevent unauthorized access.
Initially, I wasn’t entirely sure where to start. The idea of fiddling with system settings and ensuring that everything worked correctly without causing additional problems was somewhat overwhelming. However, I knew it was important to address this issue promptly. After some research and a bit of trial and error, I was able to enable NLA on Windows 10 and Windows 11 systems successfully. Here’s a step-by-step guide based on my experience.
First, I made sure to back up all important data and create a restore point on each machine I was going to work on. This precaution was crucial in case something went wrong during the configuration process.
On the Windows 10 machine, I began by accessing the Remote Desktop settings. To do this, I opened the Start menu and typed “Settings” in the search bar, then selected “Settings” from the results. Once in the Settings window, I clicked on “System,” then navigated to “Remote Desktop” on the left-hand menu.
In the Remote Desktop settings, I found an option labeled “Enable Remote Desktop.” This needed to be turned on if it wasn’t already. I toggled this switch to enable the feature. Below this option, there was a link to “Advanced settings,” which I clicked to proceed.
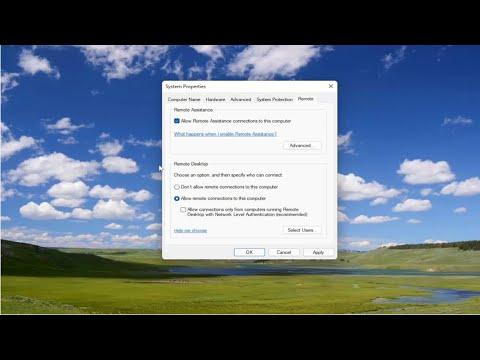
Within the Advanced settings, I looked for a section titled “Require computers to use Network Level Authentication (NLA) to connect.” This was a checkbox that needed to be selected. I checked the box to enable NLA. This setting ensures that only clients that support NLA can connect, thus adding an additional security layer. After selecting this option, I saved the changes and closed the settings window.
Next, I moved on to the Group Policy Editor to ensure that NLA was enforced system-wide. I opened the Run dialog by pressing Win + R, typed “gpedit.msc,” and hit Enter. This opened the Local Group Policy Editor. In the Group Policy Editor, I navigated to “Computer Configuration,” then “Administrative Templates,” followed by “Windows Components,” and then “Remote Desktop Services.”
Within “Remote Desktop Services,” I found the “Remote Desktop Session Host” folder, clicked on it, and then selected “Security.” Here, I located the policy named “Require user authentication for remote connections by using Network Level Authentication.” I double-clicked on this policy and set it to “Enabled.” This step was crucial because it enforced the NLA requirement at a more granular level, ensuring that all remote desktop connections needed to pass through NLA.
After making these changes, I restarted the machine to apply the new settings. It was important to verify that the changes took effect properly. I tested connecting to the machine via Remote Desktop from another computer to ensure that the authentication prompt was indeed appearing before the session was established.
The same process applied to Windows 11 machines with minor differences. I opened the Settings app, navigated to “System,” then “Remote Desktop,” and enabled Remote Desktop if it wasn’t already turned on. I then accessed “Advanced settings” and checked the box for “Require computers to use Network Level Authentication (NLA) to connect.”
In Windows 11, the Group Policy Editor steps were similar. I accessed the Run dialog, entered “gpedit.msc,” navigated through the policy settings in the same manner as I did on Windows 10, and enabled the NLA enforcement policy.
After configuring both Windows 10 and Windows 11 machines, I performed a series of tests to confirm that NLA was functioning as expected. I connected to each machine from different client devices to verify that the additional authentication prompt appeared and that only authenticated users could access the remote desktop sessions.
In the end, enabling Network Level Authentication significantly improved the security of our remote desktop connections. The process, while initially intimidating, became a straightforward task with a clear understanding of the necessary steps. By following these procedures, I ensured that our remote access was not only compliant with security standards but also much more secure against unauthorized access.