To enable offline mode in Gmail, follow these steps:
1. Open your Google Chrome browser and go to Gmail.com. Log in with your credentials if you haven’t already.
2. Once you’re in your inbox, look for the gear icon in the upper-right corner of the screen. Click on it to access your Gmail settings.
3. In the drop-down menu, select “See all settings” to open the full settings menu.
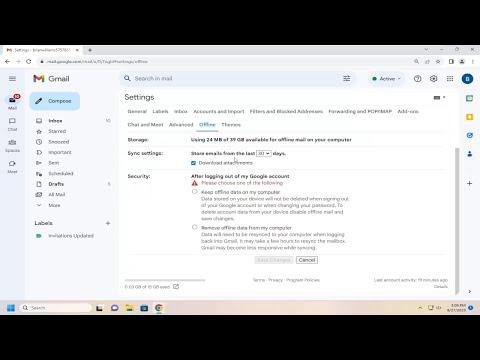
4. Navigate to the “Offline” tab, which you’ll find among the various settings categories.
5. In the Offline settings, check the box that says “Enable offline mail.”
6. You’ll be presented with options to choose how many days of emails you want to be available offline. You can select from 7, 30, or 90 days. Choose the option that best suits your needs.
7. There is also an option to “Keep offline data on my computer.” Ensure this box is checked if you want to store emails on your computer, which allows you to access them even without an internet connection.
8. After you’ve configured your settings, click “Save Changes” to apply them.
9. Gmail will now begin syncing your emails based on the settings you selected. This process might take some time, depending on the volume of emails and your internet connection.
10. Once the synchronization is complete, you can access your emails offline by opening Gmail while not connected to the internet. Your emails will be available for reading, composing, and responding, and any changes you make will be synced the next time you connect to the internet.
This setup ensures that you’re not completely cut off from your emails when you’re in a situation with no internet access. By following these steps, you can effectively manage your Gmail account offline, making it easier to stay productive and connected regardless of your online status.
