I’ve always been an avid gamer, and when I upgraded to a new monitor with variable refresh rate (VRR) support, I was eager to take full advantage of it. My new monitor promised smoother gameplay and reduced screen tearing, which are essential for my gaming experience. However, when I started playing my favorite games, I noticed that the performance wasn’t as smooth as I had anticipated. Frustrated, I realized that I hadn’t yet enabled the Variable Refresh Rate feature in Windows 11. It became apparent that I needed to delve into the settings to make sure everything was configured correctly.
My first step was to check if my monitor was correctly connected and recognized by Windows 11. I made sure the monitor was plugged in via HDMI 2.1 or DisplayPort 1.4, as these connections are necessary to support VRR. I navigated to the Display Settings by right-clicking on the desktop and selecting “Display settings.” There, I could see my monitor listed, and the resolution and refresh rate were correct. However, the variable refresh rate feature was not yet enabled.
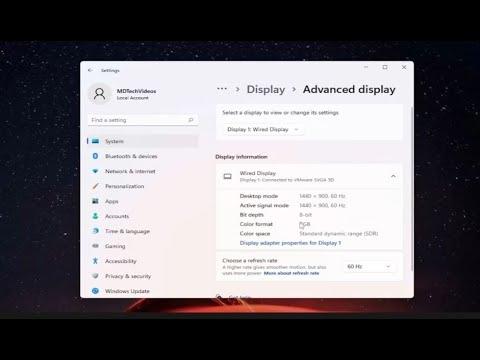
To ensure VRR was activated, I had to go into the Advanced Display Settings. I clicked on “Advanced display settings” at the bottom of the Display Settings page. Here, I checked the “Refresh rate” section to confirm that my monitor was set to a high refresh rate, which is crucial for VRR to work effectively. The higher the refresh rate, the more noticeable the benefits of VRR would be.
The next step involved diving deeper into the settings of Windows 11. I knew that VRR support in Windows 11 was supposed to be straightforward, but I still needed to confirm that everything was correctly configured. I accessed the “Graphics settings” by typing “Graphics settings” into the search bar and selecting it from the results. In this section, I ensured that “Hardware-accelerated GPU scheduling” was enabled, as this feature helps manage the workload between the CPU and GPU more effectively, enhancing the performance of VRR.
Next, I moved on to the specific settings for the games I wanted to play. Many modern games have their own settings for VRR and may need to be configured individually. I opened one of my favorite games and navigated to the graphics settings menu. I looked for options related to VRR, G-Sync, or FreeSync, depending on the technology supported by my monitor. Enabling these settings ensured that the game would take full advantage of the variable refresh rate capabilities of my monitor.
It was also essential to check if my graphics card drivers were up to date. Outdated drivers can cause compatibility issues and prevent VRR from functioning correctly. I opened the Device Manager by right-clicking on the Start button and selecting “Device Manager.” Under “Display adapters,” I found my graphics card and right-clicked on it to select “Update driver.” I chose the option to search automatically for updated driver software, allowing Windows to find and install the latest drivers.
After updating the drivers, I restarted my computer to make sure all changes took effect. I then revisited the Display Settings to confirm that VRR was now enabled. I noticed a significant improvement in the smoothness of the gameplay, and the screen tearing that had previously bothered me was no longer an issue. The games ran more fluidly, and the overall experience was far more enjoyable.
One of the key aspects I learned during this process was the importance of verifying the compatibility of my hardware. Not all monitors and graphics cards support VRR, so it’s crucial to ensure that all components in my setup are compatible with the technology. Checking the specifications of both my monitor and graphics card beforehand helped me understand what I needed to achieve optimal performance.
In addition to configuring the settings on Windows 11, I also explored some online forums and communities where other gamers shared their experiences with VRR. These platforms provided valuable insights and troubleshooting tips that helped me refine my setup further. For instance, I discovered that some games may require specific in-game settings adjustments to fully benefit from VRR, which was helpful information that I incorporated into my gaming routine.
Overall, enabling Variable Refresh Rate for games in Windows 11 turned out to be a straightforward process once I understood the necessary steps. By checking my monitor connection, adjusting display settings, updating drivers, and configuring individual game settings, I was able to significantly enhance my gaming experience. The smoother gameplay and reduced screen tearing made a noticeable difference, and I was finally able to enjoy my games to their fullest potential.