I remember the day I first encountered the challenge of managing Task Scheduler history in Windows 11. It all began with a seemingly innocuous issue: my computer wasn’t performing as smoothly as it used to, and I suspected that some of the scheduled tasks were failing or not running as expected. Curious to pinpoint the exact problem, I decided to dive into Task Scheduler to review its history and understand what might be going wrong. Little did I know that this journey would lead me to uncover and tackle the intricacies of Task Scheduler’s history management.
Initially, I wasn’t familiar with how Task Scheduler operated beyond its basic functions. I knew it was a tool for automating tasks, but I had never really delved into its history or troubleshooting capabilities. My first step was to open Task Scheduler, a tool that allows Windows to execute tasks automatically based on predefined triggers. To my surprise, when I tried to view the history of scheduled tasks, I found that it was turned off by default. This discovery led me to explore how to enable, view, and clear Task Scheduler history effectively.
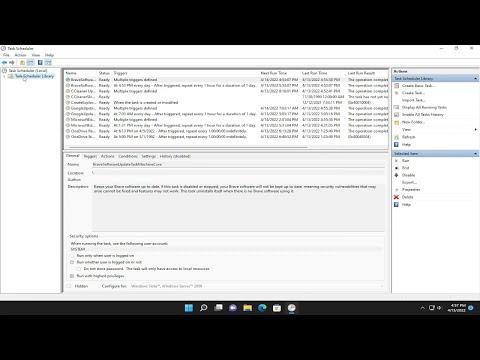
Enabling Task Scheduler history was the first crucial step. When I opened Task Scheduler and navigated to the “Task Scheduler Library,” I noticed that the “History” tab was missing. This was because Task Scheduler history was not enabled by default. To enable it, I had to go through the following process:
-
I started by opening Task Scheduler. I did this by pressing the Windows key and typing “Task Scheduler” into the search bar, then selecting the application from the results.
-
Once Task Scheduler was open, I clicked on “Task Scheduler (Local)” in the left pane to ensure I was in the correct context.
-
I then navigated to the “Action” menu in the right pane and selected “Enable All Tasks History.” This action was essential as it activated the history logging for all tasks, allowing me to monitor their execution and diagnose any issues.
After enabling Task Scheduler history, I returned to the “Task Scheduler Library” and checked the “History” tab. To my relief, I could now see detailed logs of tasks, including their start times, end times, and any errors that occurred during their execution. This visibility was crucial for troubleshooting and understanding why certain tasks might have failed or behaved unexpectedly.
However, as time went on, I noticed that the history logs were becoming increasingly cluttered. With numerous tasks generating logs, the history view became cumbersome and less useful. This led me to explore how to clear Task Scheduler history to keep the logs manageable and relevant.
Clearing Task Scheduler history was a straightforward process, but it was important to approach it with caution to avoid deleting valuable information unintentionally. Here’s how I managed to clear the history:
-
I opened Task Scheduler and once again navigated to the “Task Scheduler Library.”
-
I selected the specific task for which I wanted to clear the history. This allowed me to focus on individual tasks rather than clearing all logs at once.
-
In the right pane, I clicked on “Properties” and then navigated to the “History” tab within the task’s properties window.
-
To clear the history, I clicked on the “Clear History” button. This action removed the historical logs for that specific task, effectively resetting its history.
For a more thorough approach, I could clear the entire history across all tasks. To do this:
-
I accessed the “Event Viewer” by pressing the Windows key and typing “Event Viewer,” then selecting the application from the search results.
-
In the Event Viewer, I navigated to “Applications and Services Logs” -> “Microsoft” -> “Windows” -> “TaskScheduler.”
-
I right-clicked on the “Operational” log and selected “Clear Log.”
This method was more drastic, as it removed all historical data related to Task Scheduler from the Event Viewer. I used this approach sparingly to ensure I didn’t lose valuable information that could be crucial for long-term troubleshooting.
Throughout this process, I learned the importance of maintaining Task Scheduler history for effective system management. By enabling and regularly reviewing the history, I could stay informed about task performance and potential issues. On the other hand, clearing the history periodically helped me avoid clutter and focus on current and relevant data.
In conclusion, my experience with Task Scheduler in Windows 11 taught me valuable lessons about managing scheduled tasks and their histories. Enabling history provided the insights I needed to diagnose issues, while clearing history helped me keep the system organized and efficient. Through this journey, I gained a deeper understanding of Task Scheduler’s capabilities and how to leverage them for optimal system performance.