When I first encountered the need to encrypt a folder on Windows 11, I was looking for a way to secure sensitive information. The process seemed straightforward, but I wanted to ensure I was doing it correctly. Here’s a detailed guide on how I managed to encrypt a folder in Windows 11, which might help you if you find yourself in a similar situation.
First and foremost, I ensured that my Windows 11 operating system was up to date. This is crucial because updates often include security patches that can affect encryption processes and other system functionalities. Once I verified that everything was current, I moved on to the actual encryption process.
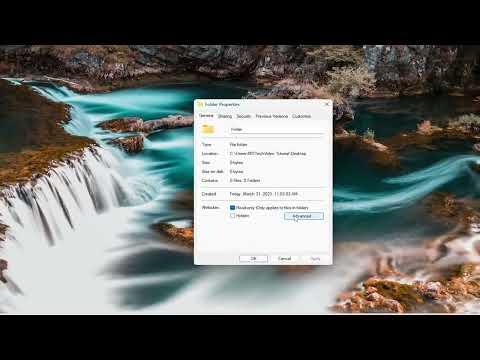
Windows 11 offers built-in encryption through the use of the Encrypting File System (EFS), a feature that has been around for a while. EFS is designed to provide encryption at the file system level, meaning that it encrypts files and folders on an NTFS volume, making them inaccessible to unauthorized users. To use EFS, the first step is to ensure that the folder I wanted to encrypt was on an NTFS-formatted drive. I double-checked this by right-clicking on the drive where the folder was located, selecting “Properties,” and looking under the “General” tab to confirm that the file system was NTFS.
With that confirmed, I navigated to the folder I wanted to encrypt. Right-clicking on the folder brought up a context menu, where I selected “Properties.” This action opened a new window with various options. In this window, I clicked on the “Advanced” button, which is located in the “General” tab. This button is essential for accessing encryption settings.
In the Advanced Attributes window that appeared, I checked the box labeled “Encrypt contents to secure data.” This is where the magic of encryption happens. By selecting this option, I instructed Windows 11 to encrypt the folder and all of its contents. After selecting this checkbox, I clicked “OK” to close the Advanced Attributes window and then “Apply” in the Properties window to apply the changes.
At this point, Windows 11 began encrypting the folder. The time it took varied depending on the size and number of files within the folder. A dialog box appeared informing me that the encryption process was underway. Once the encryption was complete, I noticed a change in the folder’s icon. The folder icon now displayed a small padlock symbol, indicating that it was encrypted.
To ensure that the encryption was working as intended, I attempted to access the folder from another user account on my system. As expected, the folder was inaccessible from accounts that did not have the appropriate permissions. This reinforced my confidence that the encryption was effective and that my data was secure.
One important aspect of using EFS is that it integrates with the user’s account credentials. This means that the encrypted folder is accessible only to the user account that performed the encryption. To share the encrypted folder with other users, I would need to use additional steps, such as creating a backup of the encryption key or using a different method to provide access to others.
In addition to EFS, I considered using third-party encryption software for added flexibility and features. While Windows 11’s built-in encryption is quite robust, third-party tools can offer additional functionalities such as advanced encryption algorithms, password protection, and the ability to encrypt entire drives. I researched several options and found that many reputable third-party encryption tools are available, each with its own set of features and user interfaces.
After researching third-party options, I chose a tool that fit my needs and followed the instructions provided by the software’s developer. The process typically involved installing the software, selecting the folder to encrypt, and setting up a password or encryption key. These tools often offer more granular control over encryption settings, which can be useful for specific security requirements.
I also explored the possibility of encrypting entire drives or partitions, not just individual folders. Windows 11 provides a feature called BitLocker, which is designed for full disk encryption. BitLocker encrypts the entire drive, providing a higher level of security compared to folder-level encryption. To use BitLocker, I accessed the Control Panel, navigated to “System and Security,” and selected “BitLocker Drive Encryption.” From there, I followed the prompts to enable encryption on the desired drive.
Enabling BitLocker required setting up a recovery key, which is a crucial step in case I ever needed to recover the encrypted drive. BitLocker also offered the option to encrypt the entire drive or just the used space, providing flexibility based on my needs.
Throughout this process, I maintained a backup of my encryption keys and passwords in a secure location. Losing access to these keys could mean losing access to my encrypted data, so I took extra precautions to ensure that I had a reliable backup plan.
In summary, encrypting a folder in Windows 11 is a straightforward process with built-in tools like EFS and additional options like third-party software or BitLocker for more comprehensive encryption needs. By following these steps and ensuring that I kept my encryption keys secure, I was able to protect my sensitive data effectively. Whether using built-in features or exploring third-party tools, the key takeaway is that encryption is an essential aspect of data security, and understanding the available options helps ensure that my information remains safe and secure.