It was a typical Tuesday evening, and I was working on a project that required substantial memory usage. As I started multiple applications and opened several large files, my computer began to slow down noticeably. Frustrated by the lag and the frequent freezing, I decided to investigate the issue further. My computer was running Windows 11, and I was determined to figure out how much memory was in use and whether there were any free memory slots available for upgrade.
I began by checking the Task Manager, which is usually the first step in diagnosing any performance issues on a Windows machine. To do this, I right-clicked on the taskbar and selected “Task Manager” from the context menu. In the Task Manager window, I navigated to the “Performance” tab. This tab provides a comprehensive overview of the CPU, memory, disk, and other system resources.
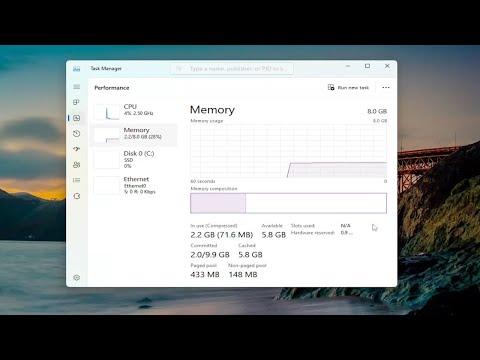
Under the “Performance” tab, I clicked on “Memory” to see detailed information about my system’s memory usage. The Memory section displayed a graph of memory usage, which showed the total amount of memory installed, the amount in use, and the amount available. However, while this information was useful, it did not directly show me how many free memory slots were available.
Realizing that I needed more detailed information about the physical memory slots on my motherboard, I decided to use the built-in Command Prompt utility. I opened Command Prompt with administrative privileges by typing “cmd” into the search bar, right-clicking on the Command Prompt app, and selecting “Run as administrator.” Once the Command Prompt window was open, I used the Windows Management Instrumentation Command-line (WMIC) tool to get information about the memory slots.
I typed the following command into Command Prompt:
arduinowmic memorychip get devicelocator, capacity
This command displayed the location of each memory chip (i.e., which slot it was installed in) and the capacity of each chip. By comparing the results with the total amount of installed memory I had seen in Task Manager, I could determine which slots were occupied and which were free. This was helpful, but I wanted a more visual representation of the available slots.
I then decided to use a third-party utility to get a clearer picture of my memory configuration. After some quick research, I found a tool called CPU-Z that is well-regarded for providing detailed information about system hardware. I downloaded and installed CPU-Z from its official website. Once the installation was complete, I launched the application and navigated to the “SPD” (Serial Presence Detect) tab.
The SPD tab in CPU-Z provided a detailed breakdown of each memory slot, including the memory size, type, and the manufacturer. It showed me which slots were populated with memory modules and which were empty. This visual representation made it much easier to see which slots were free and which were in use.
With this information, I was able to determine that two of my four memory slots were occupied, and two were still free. This was crucial because it meant that I could potentially add more RAM to my system without needing to remove or replace any existing modules. I noted the type and speed of the currently installed memory to ensure that any additional RAM I purchased would be compatible.
Next, I went online to check for compatible memory modules. I made sure to match the specifications of the existing RAM to avoid compatibility issues. After finding a suitable RAM module that matched the specifications and purchasing it, I prepared to install it.
To install the new RAM, I first turned off my computer and unplugged it from the power source. I then opened the computer case by removing the screws on the side panel. Once the case was open, I located the memory slots on the motherboard. The free slots were easily identifiable, and I carefully inserted the new RAM module into one of the empty slots. I ensured that the module was seated firmly and evenly in the slot.
After installing the new RAM, I reattached the side panel of the computer case and plugged the computer back into the power source. I turned on the computer and entered the BIOS/UEFI settings to confirm that the new RAM was detected. The BIOS/UEFI showed the updated total amount of memory, confirming that the installation was successful.
Once I booted back into Windows, I checked the Task Manager again to see the updated memory status. The additional RAM was recognized and available for use, which improved the performance of my system significantly. Applications that previously lagged now ran smoothly, and multitasking became much more efficient.
In summary, finding free memory slots in Windows 11/10 involves checking the Task Manager for current memory usage, using Command Prompt or PowerShell to get detailed information about memory slots, and utilizing third-party tools like CPU-Z for a more visual representation. Once the free slots are identified, installing new memory modules can enhance system performance and provide a better overall computing experience.