I remember the day clearly when I encountered a troubling issue with my Windows 11 system. It started as a regular Tuesday morning, with me preparing to get some work done. I had just installed the latest updates, believing everything was running smoothly, but then I noticed that my computer was acting strange. Programs were crashing, and the system was unusually slow. I decided to restart, hoping that a reboot might resolve the problem. To my dismay, it only got worse. My computer became stuck in a continuous loop of trying to install updates, failing, and then rolling back to the previous version. It was incredibly frustrating and disruptive, and I knew I had to address this issue promptly.
Initially, I wasn’t sure what was causing the update failure. I had heard about Windows update issues before but never experienced them myself. The first thing I did was check the error messages that appeared on the screen. They were vague, mentioning something about “incompatibility” and “installation failure.” Based on this information, I started searching for solutions online. I discovered that update failures are a common issue with Windows systems, and there are several steps one can take to resolve them. Determined to fix this myself, I decided to follow a structured approach.
The first step I took was to ensure that my computer was not simply experiencing a temporary glitch. I restarted the system and tried to run the update again. This time, the update installation seemed to get further, but it still failed eventually. I then moved on to the next step: checking for error codes. These codes can provide more specific information about what went wrong. By navigating to the “Windows Update” section in the Settings app, I found the error code associated with the failed update. I noted it down and looked it up online, which led me to some useful troubleshooting steps.
One of the recommended steps was to use the Windows Update Troubleshooter. This tool is built into Windows and can automatically detect and fix issues related to updates. I opened the Settings app, went to “System,” and then selected “Troubleshoot.” From there, I ran the “Windows Update Troubleshooter.” The tool worked through several checks and attempted to resolve the issues it found. After it completed, it indicated that it had fixed some problems, but the update issue still persisted. However, this step had cleared out some of the potential obstacles.
Next, I decided to manually clear the Windows Update cache. Sometimes, corrupted files in the update cache can cause installation failures. To do this, I opened Command Prompt as an administrator and stopped the Windows Update services by typing net stop wuauserv and net stop cryptSvc. I then navigated to the C:\Windows\SoftwareDistribution folder and deleted its contents. After this, I restarted the services with the commands net start wuauserv and net start cryptSvc. This process essentially resets the update components and can resolve issues related to corrupted cache files.
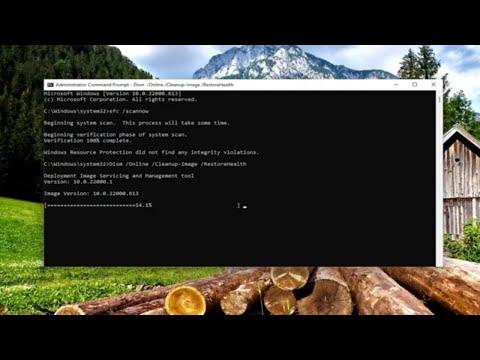
Despite these efforts, the update still failed. I realized it might be necessary to check for system file corruption, which could be interfering with the update process. I used the System File Checker tool by running sfc /scannow in Command Prompt. This tool scans for and attempts to repair corrupted system files. It took some time to complete, and I was relieved when it finished without finding any major issues. To further ensure that the system files were in good condition, I also ran the Deployment Imaging Service and Management Tool (DISM) with the command DISM /Online /Cleanup-Image /RestoreHealth. This tool fixes Windows image problems that might be preventing the update from installing.
After running these tools, I decided to attempt the update once more. To my relief, the update process finally succeeded. However, I wasn’t entirely confident that the problem was entirely resolved, so I checked for any additional updates or pending installations. Everything appeared to be up-to-date, and the system seemed to be running smoothly.
Even with the issue resolved, I took some additional precautions to prevent future update failures. I ensured that my system drivers were up-to-date and checked for any compatibility issues with installed software. I also made sure to regularly back up my data, which provided peace of mind in case of future problems.
In summary, dealing with a failed Windows 11 update can be a frustrating experience, but following a systematic troubleshooting approach can help resolve the issue. From running built-in troubleshooters to manually clearing cache files and checking system integrity, each step plays a crucial role in addressing update failures. My experience with this issue taught me the importance of being methodical and patient while troubleshooting. By taking these steps, I managed to fix the problem and get my computer back to its normal operating state.
