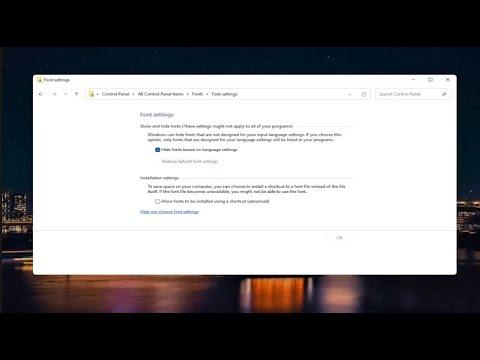
When I encountered corrupted fonts on my Windows 11 system, I knew I had to tackle the issue promptly to avoid any potential disruptions to my workflow. Here’s how I fixed the problem, step by step.The first thing I did was verify the extent of the corruption. Fonts in Windows 11 can become corrupted due to various reasons such as improper installation, software conflicts, or system errors. Corrupted fonts can lead to display issues, garbled text, or missing characters, so it’s crucial to address this promptly.To begin with, I accessed the Fonts settings by opening the Start menu and typing “Fonts.” From the search results, I clicked on “Fonts settings,” which opened the Fonts page in the Settings app. Here, I could see a list of all the fonts installed on my system. I looked for any fonts that appeared to be missing or displaying incorrectly. This helped me identify which fonts were affected.Next, I decided to use the built-in Font Troubleshooter to automatically detect and fix issues with fonts. I navigated to the Control Panel by typing “Control Panel” in the Start menu and selecting it from the results. Once the Control Panel was open, I changed the view to “Large icons” and selected “Fonts” from the list. In the Fonts window, I clicked on “Font settings” located on the left sidebar. Here, I found the “Restore default font settings” button. I clicked this button to reset the font settings to their default state. This process helped in resolving some common font issues by reverting any changes that might have led to corruption.However, if this step didn’t resolve the issue, I proceeded to manually uninstall and reinstall the corrupted fonts. To do this, I went back to the Fonts settings in the Settings app. I located the corrupted fonts, clicked on them to open the font preview, and selected the “Uninstall” button. After removing the fonts, I needed to reinstall them.To reinstall the fonts, I had to obtain the font files. If the fonts were standard system fonts, I could download them from the Microsoft website or use a trusted font repository. For custom or third-party fonts, I retrieved the font files from a backup or the original source. I ensured that the font files were in the correct format, typically .ttf (TrueType Font) or .otf (OpenType Font).With the font files ready, I proceeded to reinstall them. I simply dragged and dropped the font files into the Fonts folder in the Control Panel, or alternatively, I right-clicked on the font files and selected “Install.” This process added the fonts back to the system. I made sure to restart my computer after reinstalling the fonts to ensure that all changes took effect properly.In some cases, the issue might not be with the fonts themselves but with the font cache. The font cache is a database that stores information about the fonts installed on the system to speed up font rendering. A corrupted font cache can lead to display issues, so I decided to clear it. To do this, I opened the Command Prompt as an administrator by typing “cmd” in the Start menu, right-clicking on “Command Prompt,” and selecting “Run as administrator.” In the Command Prompt window, I typed the following commands one by one:net stop fontcachedel %windir%\System32\FNTCACHE.DATnet start fontcacheThese commands stopped the font cache service, deleted the corrupted cache file, and restarted the service. Clearing the font cache allowed Windows 11 to rebuild it with fresh data, which often resolved font display issues.Another approach I took was to check for Windows updates. Sometimes, system updates include fixes for known issues, including font-related problems. I opened the Settings app, navigated to “Update & Security,” and clicked on “Windows Update.” I then selected “Check for updates” to ensure my system was up-to-date. Installing the latest updates resolved any underlying issues that might have contributed to the font corruption.If none of these methods worked, I considered restoring my system to a previous state using System Restore. System Restore is a feature that allows you to revert your computer to a previous state before certain issues occurred. I accessed System Restore by typing “Create a restore point” in the Start menu and selecting it from the results. In the System Properties window, I clicked on the “System Restore” button, followed the on-screen instructions, and chose a restore point before the font corruption occurred. This process helped if the corruption was due to recent changes or installations.In summary, fixing corrupted fonts in Windows 11 involved several steps: identifying the corrupted fonts, using the built-in Font Troubleshooter, manually uninstalling and reinstalling fonts, clearing the font cache, checking for Windows updates, and, if necessary, using System Restore. By following these steps, I was able to resolve the font issues and restore normal functionality to my system.
How to Fix Corrupted Fonts in Windows 11 [Tutorial]
